 |
 |
Real Estate Blog
|
|
|
Friday, June 06 2014
Especially when it comes to major decisions like buying or selling your home, human nature seems to tilt toward delaying action until it’s the end result is absolutely certain. After all, nobody wants to make a life-changing move that turns out to be anything short of fantastic!
So even when you’ve outgrown your current home…or found yourself in a daily long-distance commute because work has moved…or any number of other reasons why you know you should be looking for a new house…it can be difficult to commit to such a looming decision. Adding to that is one of the most common assumptions many homeowners believe: that they have to spend a boatload of money to increase their home value.
The truth is: it ain’t so! You can strategically update your house before you put it on the market without depleting your bank account.
Items that only seem to require costly fixes:
· Make it Spacious
Adding space to a room increases any home value. Tearing out walls isn’t necessary when there are so many other ways to achieve the same thing. Simple options include removing built-in shelves, enlarging windows, or (the simplest) just removing “stuff” that’s hogging perceived space.
· Go Green
More and more, you can improve your home value by installing modest “green” upgrades. Today’s buyers may not necessarily be eco-focused—they may simply have a good sense of the increasing cost of water and power. “Going green” as a way to add home value to your area property can be no more costly than switching to low-flow toilets, adding a WiFi thermostat with “smart” technology, or putting in a low cost drip watering system.
· Window Update
Have a room that comes across as outdated…or just plain ‘blah’? Consider how much extra home value a new window treatment might add. It could be as simple as installing a stylish valence over a window or two.
· Change the Doors
Remember your first apartment with its flimsy, hollow doors? A quality door can make a disproportionate difference to a property’s perceived home value. Changing out your front or back doors for more a more weighty or modern selection can be well worth the expense.
· Paint
Paint is the number one way to alter the look of a room inexpensively. Instead of painting the entire room one color, another option is to make a “statement wall” in its own neutral color that compliments a painting’s or picture frame’s palate.
These are just a few suggestions that can increase the value of your home without a straining the family finances. Even in an older home, many times it’s the little touches that can make the greatest difference.
Looking for specific suggestions to improve the value of your home before listing it for sale? Call me today for an in-home market evaluation! You can reach me on my cell phone
812-499-9234 or email Rolando@RolandoTrentini.com
Monday, December 16 2013
It’s easy to be caught off guard when the mercury drops before winter has even begun. And this year a visit from unusually early icy blasts of cold from up north has been the rule almost everywhere in the country. This Holiday Season, even local house owners who don’t have to worry about their own house safety may be visiting relatives unprepared for the sudden December tundra; so it’s a good time to go over the Red Cross cold weather Preventive Action guidelines:
- Open kitchen and bathroom cabinet doors to allow warmer air to circulate around the plumbing (but: move any harmful cleaners and household chemicals up out of the reach of children). And keep garage doors closed!
- In very cold weather, let the cold water drip from the faucet served by exposed pipes. Running water through the pipe - even at a trickle - helps prevent pipes from freezing.
- If you will be going away, leave the heat on in the house, set to a temperature no lower than 55° F.
Following those tried-and-true guidelines should mean you’re home free. But if you turn on a faucet and only a trickle comes out, suspect a frozen pipe. Trace the culprit: likely places for frozen pipes include against exterior walls or where your water service enters the house through the foundation. To thaw frozen pipes:
- Apply heat to the section of pipe using an electric heating pad wrapped around the pipe, an electric hair dryer, a portable space heater (kept away from flammable materials), or by wrapping pipes with towels soaked in hot water. Do not use a blowtorch, kerosene or propane heater, charcoal stove, or other open flame device—no matter how tempting.
- Keep the faucet open. As you treat the frozen pipe and the frozen area begins to melt, water will begin to flow through the frozen area. Running water through the pipe will help melt ice inside the pipe.
- Check all other faucets in your home to find out if you have additional frozen pipes. If one pipe freezes, others may freeze, too.
- Apply heat until full water pressure is restored. If you are unable to locate the frozen area, if it’s not accessible, or if you cannot thaw the pipe, you’ll have to call a licensed plumber. If you need a reference, call me anytime for this or any other house questions.
You can reach me on my cell phone 812-499-9234 or email Rolando@RolandoTrentini.com
Monday, October 21 2013
After buyers move in to their new home, they should be prepared for some home fixes to present themselves each season, says Rich Escallier, a handyman in Chicago. "If you can go six months without finding something that raises your blood pressure, you're lucky,” Escallier says.
CBS MoneyWatch recently released a checklist of routine maintenance and small home repairs that home buyers should expect to do their first year to help avoid more costly problems from surfacing later on:
During move-in week: Turn on all major appliances and run them for a complete cycle. Even if the buyer already completed a home inspection, they should test again, experts say. After all, “if you have a minor leak under the dishwasher, that water leaks into the subfloor and you can't see it," says Daniel Cipriani with Kade Homes & Renovations in the Atlanta area. "But you'll start to notice the hardwood floor buckling."
45 days after move-in: Change the HVAC system filter and vacuum out the air intake vents. “Capturing dirt and dust with the right filter can go a long way toward preserving the new home appeal for a few years,” CBC MoneyWatch notes.
Six months after move-in: Inspect the exterior of your home in both the summer and fall to ensure rainwater is draining away from the home properly. Also, clean out clogged gutters and downspouts. "Landscaping should be negatively graded away from the house," Cipriani says. "People don't think it's a big problem, but otherwise water pools against the foundation and doesn't have anywhere to go."
Every year: Inspect the home’s roof for any missing shingles and gaps around the chimneys. Also, check the ceilings inside the home for any water spots and indications of potential leaks.
Experts also note that every two years, home owners would be wise to hire a professional HVAC contractor to inspect their furnace, air conditioner, and hot water heater. A ruptured reservoir could potentially spill 40 gallons of water in a mere few hours so experts recommend home owners install a water alarm with sensors in the collection pan underneath the hot water heater. The sensors cost about $25 and can help save home owners from costly water damage.
Source: http://finance.yahoo.com/news/repairs-every-new-homebuyer-should-make-183804213.html
Tuesday, June 25 2013
On Thursday, Bloomberg’s online news service confirmed what we had been hearing in more general terms: “Sales of previously owned U.S. homes climbed more than forecast in May…and prices jumped, indicating more progress for residential real estate.” Agents here in Evansville would also not have been surprised at the national surge in selling prices “by the most since October 2005”. If you were already inclined to sell your own home, it looks more and more as if this summer will be a propitious time to jump on the opportunity.
As real estate agents gear up to maximize the market’s improvement, homeowners are also weighing some of the more popular alternatives for boosting valuations when it comes to selling —
- Prospective homebuyers are increasingly energy savvy, so when new appliances need to be updated prior to sale, the more energy-efficient they are, the more worth highlighting they will be. Real estate agents know how to emphasize a property’s ‘green’ attributes.
- If you have an attic or a basement that is currently serving little purpose, conversion can pay off. Basements are often the more affordable option since they call for little structural remodelling. Conversions can be into a games room, office, or utility area. Attics are often best converted to bedrooms or office space (or at least staged to suggest the possibility).
- In Evansville, real estate agents love to offer properties with decks — especially in the summertime. If you are prepared to engage in a little DIY, adding a deck can be among the most cost-effective of improvements. According to HGTV, the cost of a professionally built deck starts at about $15 per square foot, with more elaborate installations featuring costly hardwoods or composite materials running closer to $35.
Even if you do not intend to sell, a little extra money invested in your home may be a dollar-wise idea. Thoughtful investments can enrich your own living experience AND attract higher prices when the time comes to move on. If you’re looking for a real estate agent in Evansville, call me today to go over other improvement ideas. You can reach me on my cell phone 812-499-9234 or Rolando@RolandoTrentini.com
Friday, March 22 2013
Deep clean your house and you’ll brighten rooms and help maintain your home’s value.
Deep cleaning your house is that top-to-bottom, take-no-dust-bunny-prisoners, mother-in-law-quality cleaning that truly maintains the value of your home. Here are frequently overlooked areas that a little spit and polish wouldn’t hurt.
De-bug the light fixtures
See that bug burial ground within your overhead fixtures? Turn off the lights and carefully remove fixture covers, dump out flies and wash with hot soapy water. While you’re up there, dust bulbs. Dry everything thoroughly before replacing the cover.
Vacuum heat vents and registers
Dirt and dust build up in heat vents and along register blades. Vents also are great receptacles for coins and missing buttons. Unscrew vent covers from walls or pluck them from floors, remove foreign objects, and vacuum inside the vent. Clean grates with a damp cloth and screw back tightly.
Polish hardware
To deep clean brass door hinges, handles, and cabinet knobs, thoroughly wipe with a damp microfiber cloth, then polish with Wright’s or Weiman brass cleaner ($4). Dish soap shines up glass or stainless steel knobs. Use a Q-tip to detail the ornamental filigree on knobs and handles.
Replace grungy switch plates
Any amateur can wipe a few fingerprints off cover plates that hide light switches, electric outlets, phone jacks, and cable outlets. But only deep cleaners happily remove plates to vacuum and swipe the gunk behind. (OK, we’re a little OCD when it comes to dirt!) Make sure cover plates are straight when you replace them. And pitch plates that are beyond the help of even deep cleaning. New ones cost less than $2 each.
Neaten weather stripping
Peeling, drooping weather stripping on doors and windows makes rooms look old. If the strip still has some life, nail or glue it back. If it’s hopeless, cut out and replace sections, or just pull the whole thing off and start new. A 10-ft. roll of foam weather stripping costs $8; 16-ft. vinyl costs about $15.
Replace stove drip pans
Some drip pans are beyond the scrub brush. Replacing them costs about $3 each and instantly freshens your stove.
Read more: http://www.houselogic.com/home-advice/maintenance-repair/home-cleaning-secrets/#ixzz2O0mqzjb6
Tuesday, March 19 2013
The first day of spring falls on the 20th—making Wednesday the day many homeowners start planning their ritual seasonal maintenance. Spring is also the traditional launch of the busy season in real estate, when safeguardingproperty values can become a less abstract matter.
Because water damage is Public Enemy #1, homeowner checklists should always highlight three points:
First: the Roof
As soon as March’s lion turns a bit more lamb-like, it’s time to get out the ladder to survey roof damage. Leaves, twigs or other storm debris that have clogged gutters during the weather months can allow moisture to penetrate the roofing and below, in the worst case triggering mold or rot. Look for holes or rust in the flashings or metal seals around roof joints, chimneys, skylights or any other structures that penetrate the roof.
Second: Down Under
Now it’s time to go down. While spring rains are still falling, put fresh batteries in your flashlight and head to the furthest reaches of basement or underneath the house to check for puddles. Even when it’s raining outside, your home’s foundation should remain dry. When it comes time to sell, homes’ property values are seriously affected by water damage, some of which might not appear upstairs until later. If you see signs of trouble, it’s time to call an expert.
Third: the Exit Routes
That is— the drains. Backed-up plumbing is a nuisance you can avoid if you clean all the drains two or three times a year. Don’t forget the garbage disposal, either. My trick is to pour in equal parts salt, baking soda and vinegar, followed 30 seconds later by two quarts of boiling water. Then give the mixture a chance to work overnight before running water again.
With the sales market poised for spring action, the protection careful homeowners have given to their ownproperty values will make a material difference. But you don’t have to be selling your home for this time of year to trigger the maintenance efforts your property may need. Got a property-related question? Give me a call! You can reach me on my cell phone 812-499-9234 or email Rolando@RolandoTrentini.com
Thursday, March 07 2013
Sometimes home values can undergo abrupt changes. One way that can happen is through the ‘Surprise Remodel’ phenomenon. That’s when you wake up one morning to find that your local house grew larger…overnight!
If you are one of the many residents whose children have left for school, the Surprise Remodel is what happened the moment you realized that that you were, in fact, suddenly in possession of an extra room.
Sometimes it takes a few months, but as soon as you conclude that the sentimental value of leaving the high school memorabilia in place is outweighed by the value of transforming the room into more useful space, you have a number of ways to proceed:
Workout Area
Transforming the former kid room into an exercise area is one foolproof way home values can be increased. Remove carpeting and add flooring as needed; place a floor-to-wall mirror to one side; then add any exercise equipment you choose (garage sales can be excellent sources).
Office Space
Have you always wanted a dedicated home office? Now is the ideal time. Paint the room a rich neutral color, add the desk (freeing up space it used to occupy elsewhere), and then add bookshelves and a guest chair or sofa. Voila!
Guest Room
In the likely event the kids will be back now and then, a subtler changeover to a universal guest room is a good answer. Memorabilia removal will go a long way toward accomplishing that goal, and home values always improve when fancier bedding and pillows are added to any room.
Evansville home values may not seem important until you decide to put your own on the market, but I have often heard clients say they wish they had spruced up the place while they were still living there. Any Surprise Remodel moment is a perfect opportunity to do just that.
Later, when the time comes to list, don’t forget to call me! You can reach me on my cell phone 812-499-9234 or email Rolando@RolandoTrentini.com
Thursday, February 28 2013
Expect to see emerald everywhere — Pantone’s 2013 color queen.
Goodbye Tangerine Tango. Hello emerald, Pantone’s 2013 color of the year.
Why emerald, or as Pantone’s swatch names it: 17-5641?
“Green is the most abundant hue in nature — the human eye sees more green than any other color in the spectrum,” says Leatrice Eiseman, executive director of the Pantone Color Institute, a color consultant to corporations.
Eiseman says emerald sparkles, fascinates, and “brings a sense of clarity, renewal, and rejuvenation, which is so important in today’s complex world.”
Tangerine Tango, last year’s color queen (and my new favorite hue), was a pinkish orange that packed an energy punch. 2013’s emerald is a vivid, verdant green that “enhances our sense of well-being … promoting balance and harmony,” Pantone says.
Expect to see the color on everything from kitchen colors to gas grills to $25 commemorative mugs.
Emerald green: love it or hate it?
Read more: http://www.houselogic.com/blog/painting/pantone-color-of-2013-emerald/#ixzz2LvWTXrFR
Thursday, February 21 2013
There is a long list of household chores the beginning of each season. If you break it down with one chore a day and bundle a short, easy list on a day off from work, then it can become manageable. After all, you can only eat an elephant one bite at a time!
So first, think of your personality. If you put the worst chore first, would you be happy to get that one over with, or would you simply never start working on the list at all? Order the list to fit your comfort zone.
Spring
- Walk around the yard and take a notebook with you. Write down any lawn or outdoor buildings which require maintenance. Be sure to make specific notes, so you will not be scratching your head later trying to figure out your notes. Remember painting as well.
- Get rid of all the old stuff you have not used in a year. Garage sales are great motivators.
- Switch the clothes in the closet from heavy winter to spring.
- Check the roof. Are there any loose or deteriorating shingles? Are the gutters in need of repair?
- The outdoor furniture is calling; pull it out of storage and enjoy watching the flowers begin to grow!
Summer
- It may seem silly to think of the upcoming frost, but checking the furnace or heaters now makes sense, instead of having a failure at the worst possible moment.
- Check the screens on all the doors and the assemblies for the sliding glass doors.
- If you use contractors for replacing gutters and other outside household services, now is actually the time to take advantage of that. The fall is when they are typically the most busy.
- The kids will be spending a lot of time on the swing set, is it well maintained?
Fall
- The leaves are falling, sigh, time to rake. Make the activity more festive and have a contest to see which family member can gather the most. Remember the gutters!
- When is the last time you checked the insulation in the attic? Do any shingles need replacement after the summer sun?
- Now is the time to aerate the soil, in the front and back yards.
Winter
- It’s a perfect time to get a lot of the detailed “spring” cleaning done inside the house. Holidays are approaching and folks will be dropping by for short visits and lengthy meals. Move furniture, vacuum underneath, check the foyer closet for clutter, to make room for heavy coats and umbrellas. Give the whole house a white glove test!
- Change clothes in the closet from summer to winter.
- Check supplies to keep the walks free of ice; shovel, dry ice, salt, etc.
- Check decorations for the holidays.
Friday, January 25 2013
“What doesn’t bankrupt us makes us stronger,” writes Josh Garskof, a serial remodeler and contributing writer and/or editor for Money magazine, “This Old House,” and Martha Stewart Living. Local property owners who have attempted a remodel anytime recently are likely to find the humor – and the truth – in his wisecrack.
With the spring selling season just over the horizon, this would be about the right time for Evansville homeowners who are considering bringing their property to market to finalize plans and firm up any remodeling arrangements. Whether the project is just to freshen up a bathroom or re-landscape a whole backyard, Garskof offers the following tips:
Plan to Overspend – Yes, we all hate to acknowledge it, but surprises happen with predictable regularity. If you don’t allow for that cushion, you may find yourself in a tight spot when your contractor discovers a missing drainage system under the house.
Magnet Sweep – If you’re planning exterior work, have your team do a magnet sweep of the outdoor space when they are finished. Dozens of old, rusty nails can find their way into your lawn and into the mulch – nothing you want bare feet to encounter when summer comes (and the last thing you want potential visitors or agents stepping on during Broker’s Tour!)
Permits – Be sure to secure copies of a Certificate of Occupancy or other local code clearances from your contractor before you issue the final payment. It’s one way to help ensure the work is safe, up to code – and to have the paperwork handled when a sale is being finalized.
If you are preparing for spring and plan to do some remodeling before bringing your local property to market, I hope you will feel free to consult me before spending a single dollar. I’m here to help my clients save money where they don’t have to spend it -- and make money where they can. Especially when it comes to property improvements in Evansville, knowing today’s homebuyers can make a real difference. Email me at RolandoTrentini@FCTE.com today!
Monday, December 17 2012
By taking preventive measures before cold weather arrives, you can prevent freezing pipes and the costly damage that goes with them.
Where the trouble lies
"Some pipes are more prone to freezing than others because of their location in the home," explains Paul Abrams, spokesman for Roto-Rooter.
Pipes most at risk for freezing include:
- Exposed pipes in unheated areas of the home.
- Pipes located in exterior walls.
- Any plumbing on the exterior of the home.
Preventative measures for outside
A frozen garden hose can cause more damage than a busted hose; it can actually burst an interior pipe. When the water in the hose freezes, it expands, increasing pressure throughout the whole plumbing system. As part of your regular seasonal maintenance, garden hoses should be disconnected, drained, and stored before the first hard freeze.
If you don't have frost-proof spigots, close the interior shut-off valve leading to that faucet, open and drain the spigot, and install a faucet insulator. They cost only a couple bucks and are worth every penny. Don’t forget, outdoor kitchens need winterizing, too, to prevent damage.
Exposed interior plumbing
Exposed pipes in the basement are rarely in danger of freezing because they are in a heated portion of the home. But plumbing pipes in an unheated area, such as an attic, crawl space, and garage, are at risk of freezing.
Often, inexpensive foam pipe insulation is enough for moderately cold climates. For severe climes, opt for wrapping problem pipes with thermostatically controlled heat tape (from $50 to $200, depending on length), which will turn on at certain minimum temps.
Under-insulated walls
If pipes traveling in exterior walls have frozen in the past (tell-tale signs include water damage, mold, and moisture build-up), it’s probably because of inadequate or improperly installed insulation. It might well be worth the couple hundred dollars it costs to open up the wall and beef up the insulation.
"When nothing else works, say for a northern wall in a really cold climate, the last resort is to reroute a pipe," notes Abrams. Depending on how far the pipe needs to be moved — and how much damage is caused in the process — this preventative measure costs anywhere from $700 on up. Of course, putting the room back together is extra.
Heading south for the winter?
For folks leaving their houses for an extended period of time in winter, additional preventative measures must be taken to adequately protect the home from frozen pipes.
- Make sure the furnace is set no lower than 55 degrees.
- Shut off the main water supply and drain the system by opening all faucets and flushing the toilets.
In extreme situations (vacation home in a bitterly cold climate), Abrams recommends having a plumber come to inspect the system, drain the hot water heater, and perhaps replace the water in traps and drains with nontoxic antifreeze.
Source: http://members.houselogic.com/articles/prevent-freezing-pipes/preview/?nicmp=rcrnl&nichn=link4&niseg=122012
Tuesday, December 11 2012
Regular home maintenance is key to preserving the value of your house and property.
“It’s the little things that tend to trip up people,” says Frank Lesh, former president of the American Society of Home Inspectors and owner of Home Sweet Home Inspection Co. in Chicago. “Some cracked caulk around the windows, or maybe a furnace filter that hasn’t been changed in awhile. It may not seem like much, but behind that caulk, water could get into your sheathing, causing mold and rot. Before you know it, you’re looking at a $5,000 repair that could have been prevented by a $4 tube of caulk and a half hour of your time.”
Maintenance affects property value
Outright damage to your house is just one of the consequences of neglected maintenance. Without regular upkeep, overall property values are affected.
“If a house is in worn condition and shows a lack of preventative maintenance, the property could easily lose 10% of its appraised value,” says Mack Strickland, a professional appraiser and real estate agent in Chester, Va. “That could translate into a $15,000 or $20,000 adjustment.”
In addition, a house with chipped, fading paint, sagging gutters, and worn carpeting faces an uphill battle when it comes time to sell. Not only is it at a disadvantage in comparison with other similar homes that might be for sale in the neighborhood, but a shaggy appearance is bound to turn off prospective buyers and depress the selling price.
“It’s simple marketing principles,” says Strickland. “First impressions mean a lot to price support.”
Prolonging economic age
To a professional appraiser, diligent maintenance doesn’t translate into higher property valuations the way that improvements, upgrades, and appreciation all increase a home’s worth. But good maintenance does affect an appraiser’s estimate of a property’s economic age—the number of years that a house is expected to survive.
Economic age is a key factor in helping appraisers determine depreciation—the rate at which a house is losing value. A well-maintained house with a long, healthy economic age depreciates at a much slower rate than a poorly maintained house, helping to preserve value.
Estimating the value of maintenance
Although professional appraisers don’t assign a positive value to home maintenance, there are indications that maintenance is not just about preventing little problems from becoming larger. A study by researchers at the University of Connecticut and Syracuse University suggests that maintenance actually increases the value of a house by about 1% each year, meaning that getting off the couch and heading outside with a caulking gun is more than simply a chore—it actually makes money.
“It’s like going to the gym,” says Dr. John P. Harding, Professor of Finance & Real Estate at UConn’s School of Business and an author of the study. “You have to put in the effort to see the results. In that respect, people and houses are somewhat similar—the older (they are), the more work is needed.”
Harding notes that the 1% gain in valuation usually is offset by the ongoing cost of maintenance. “Simply put,” he says, “maintenance costs money, so it’s probably best to say that the net effect of regular maintenance is to slow the rate of depreciation.”
How much does maintenance cost?
How much money is required for annual maintenance varies. Some years, routine tasks, such as cleaning gutters and changing furnace filters, are all that’s needed, and your total expenditures may be a few hundred dollars. Other years may include major replacements, such as a new roof, at a cost of $10,000 or more.
Over time, annual maintenance costs average more than $3,300, according to data from the U.S. Census. Various lending institutions, such as Directors Credit Union and LendingTree.com, agree, placing maintenance costs at 1% to 3% of initial house price. That means owners of a $200,000 house should plan to budget $2,000 to $6,000 per year for ongoing upkeep and replacements.
Proactive maintenance strategies
Knowing these average costs can help homeowners be prepared, says Melanie McLane, a professional appraiser and real estate agent in Williamsport, Pa. “It’s called reserve for replacements,” says McLane. “Commercial real estate investors use it to make sure they have enough cash on hand for replacing systems and materials.”
McLane suggests a similar strategy for homeowners, setting aside a cash reserve that’s used strictly for home repair and maintenance. That way, routine upkeep is a snap and any significant replacements won’t blindside the family budget. McLane’s other strategies include:
Play offense, not defense. Proactive maintenance is key to preventing small problems from becoming big issues. Take the initiative with regular inspections. Create and faithfully follow a maintenance schedule. If you’re unsure of what needs to be done, a $200 to $300 visit from a professional inspector can be invaluable in pointing out quick fixes and potential problems.
Plan a room-per-year redo. “Pick a different room every year and go through it, fixing and improving as you go,” says McLane. “That helps keep maintenance fun and interesting.”
Keep track. “Having a notebook of all your maintenance and upgrades, along with receipts, is a powerful tool when it comes to sell your home,” advises McLane. “It gets rid of any doubts for the buyer, and it says you are a meticulous, caring homeowner.” A maintenance record also proves repairs and replacements for systems, such as wiring and plumbing, which might not be readily apparent.
Source: http://members.houselogic.com/articles/value-home-maintenance/preview/
Tuesday, December 04 2012
Here are six tips to get great Christmas tree lights.
Your Christmas tree can look grand if you follow these six tips for holiday lights from Mary Beth Gotti, director of the GE Lighting & Electrical Institute:
- Know your lights. If you’re buying new lights, make sure they’re compatible with your existing light strings.
- Unsure how many lights you need for your tree? Figure 100 to 150 lights per vertical foot of the tree.
- Use LED holiday lights on your tree. LED holiday lights use up to 80% less energy and are cooler than traditional incandescent lights.
- Add movement. Want that snowflake display to sparkle or your eight tiny reindeer to trot? Give the illusion of movement with color changing lights. Many options are available, including twinkling, chasing, and fade-in, fade-out styles. Check into cascading icicles with a circuit that gives off a melting effect.
- Mix lighting styles. To make holiday lighting stand out, pair strings of different sized lights together to add depth to decor. On the tree, set a base of white lights at the bottom and continue upward, adding strands of large bulbs and novelty lights for color and variety.
- Find inspiration. Every year, thousands of tree lighting ceremonies take place all over the country. Draw ideas from these magical designs.
Source: GE Lighting & Electrical Institute
Read more: http://www.houselogic.com/news/lighting/6-tips-terrific-holiday-lights/#ixzz2E6T0M16a
Tuesday, November 13 2012
When anyone sets about readying a property for sale, some things are certain. By the time that home appears in the Evansville listings, its owner will have made sure that its overall appearance is neat, clean – generally well maintained.
Drilling down further, two of the areas prospective homebuyers focus most on are the kitchen and bathrooms. That’s why everyone puts the dishes away, sets the fluffy white towels out – perhaps even lights a scented candle or two. After that, most sellers settle down to see what happens…what the ‘luck of the draw’ will bring…Hold it! Luck?
Not really! The only luck that’s called for is the kind we make for ourselves -- the kind where preparation meets opportunity!
I take care of the opportunity: a good part of my job is creating it by executing a marketing plan that works! So all that is left is preparation: in this case, going the extra step by attending to some less glamorous (and less obvious) details. One example – a surprisingly impactful one – is a minor detail in those two focal rooms, the kitchen and bathrooms.
While the clean lines of nice tile work in either can increase the value of a home, soiled or broken grout will always work the other way. Even worse, if the grout shows mold or mildew, that detail can decrease the value of a property for sale by as much as ten to fifteen percent! (That daunting figure comes via research from the Microsoft Network’s web site).
The takeaway: if you are planning to list yourproperty for sale with a realtor this fall, here are some simple tips for creating some of your own “luck”:
· When repairing grout in a marble tiled-surface, avoid using sanded grout – it is hard to avoid scratching the marble’s surface.
· When cleaning grout, do not use brushes with metal bristles: they damage or erode the grout. Experts recommend using a 50/50 solution of vinegar and baking soda to clean the grout with a stiff (not metal) bristled brush.
· Using a grout sealer when installing tile or replacing grout can help keep it clean and in good condition.
· If you need to replace grout, bring a sample to the hardware store so you can closely match its color. Precise color is impossible to remember, and a poor match makes repairs stand out.
I always start new clients with an in-home evaluation -- we compare notes on areas that may need attention as we bring the home to market. If you are considering a sale, I hope you will put a call to me at my office right at the top of your to-do list! You can reach me on my cell phone at 812-499-9234.
Monday, October 22 2012
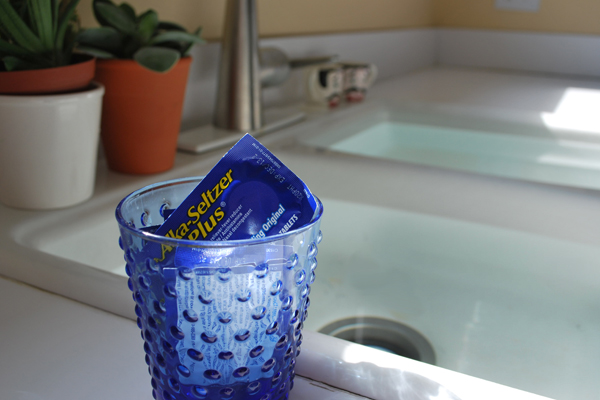
Unclog a drain by dropping three Alka-Seltzer tablets down the drain, followed by a cup of white vinegar. Image: Liz Foreman for HouseLogic
This month marks the 27th anniversary of the most influential DIY show ever. Nope we’re not talking about This Old House (which debuted in 1978). We’re referring to MacGyver, the action-adventure series that taught us any sticky situation could be fixed with a few mundane items.
To note this occasion, we asked four DIY experts to share their favorite MacGyver-inspired household hacks and tips.
Expert: MoneyCrashers.com
This penny-pinching site known for doling out smart budgeting advice came up with two quick fixes; one clears clogs while the second neatens up floors.
1. Unclog a drain
Solution: Next time one of your drains is being a pain, drop three Alka-Seltzer tablets down the sink followed by a cup of white vinegar.
We’re not 100% sure about the science behind this, but we heard when combined together, these ingredients will dissolve grease and other funky things. After about 15 minutes, you can clear the drain with boiling water.
Do not attempt this trick immediately after using a commercial drain opener like Drano or Liquid-Plumr.
FYI, you can also use this exact same solution to clean and freshen up toilet bowls.
Fun MacGyver fact: He mixed it with baking soda to create a smoke screen.
2. Fix scuffed floors
Give scuffmarks on tile and linoleum floors the boot using a tennis ball fitted on the end of a broom handle. When rubbed against the floor, the ball will remove scuffmarks.
What, you don’t have a tennis ball? Use a sneaker. The bottom of most clean sneakers can easily buff floors.
Fun MacGyver fact: He once made a missile out of a broom handle.
Expert: Domestic Imperfection
Ashley, the blogger behind this site, knows a thing or two about being crafty. Just like MacGyver, she likes hacking common office items.
Read more: http://www.houselogic.com/blog/repair-tips/macgyver-inspired-household-hacks/#ixzz2A2lA7DmS
Friday, October 19 2012
Are you haunted by strange noises and weird odors? With the proper maintenance, you’ve got more than a ghost of a chance to rest easy.
Creaking and popping in the night
The many materials that make up your house — wood framing, plywood, glass, metal ducts, nails, plumbing pipes — all expand and contract at different rates.
When a house cools at night, these materials may move slightly, rubbing against each other and making noises. Occasionally, they’ll contract with an audible pop.
These sounds tend to be more noticeable in fall, when warm days give way to rapidly cooling nights. The bad news? Not much you can do about it. The good news? Those sounds are harmless and normal.
Zombie odor
It’s either time to throw out the garbage, or you’d better call your gas utility to check on your gas lines and connections.
Natural gas is odorless, but natural gas suppliers add a foul-smelling odorant — butyl mercaptan — to alert occupants to any leaks. The smell is like rotten eggs.
Leaks can occur at your gas-fired water heater, fireplace, clothes dryer, and any gas line. Leaking natural gas is potentially dangerous — leave the house and call your natural gas provider to assess the situation. Most utility companies perform safety checks for free.
Footsteps in the attic
Amplified by an unfinished attic space, a raccoon or even a good-size squirrel on your roof might sound like an ax murderer is doing the polka overhead.
These rooftop transits are normal for critters — roofs offer a nice long unobstructed highway.
Make sure your soffit, rafter, and gable roof vents are covered with screens and in good shape, or your rooftop buddies might find their way into your attic for real. Trim back branches that provide critters easy access to your roof.
Something’s burning
You can smell the odor of burnt wood, but the smoke detectors aren’t going off and there’s no smoke in the house. The culprit could be your fireplace — even if you haven’t had a fire for days.
The probable cause is a drafty chimney and negative air pressure in your home, meaning that outside air is infiltrating down your chimney, bringing stale burnt smells with it.
Stop drafts by making sure your damper has a good seal. Regulate air pressure by adding more cold air return ducts to your HVAC system. You’ll get rid of the odor and save on your energy bill, too.
Moaning and clattering
These classic spooky sounds often show up when the wind blows and there’s a storm brewing.
Vents for clothes dryers, bathrooms, and water heaters exit out the roof or the side of the house. To prevent backdrafts, these vents have dampers — flaps designed to let vented air out and prevent outside air from coming in. These flaps sometimes move and rattle in high winds.
Because dampers often are located in attics or in between floor joists, the sound can be difficult to pinpoint. You may need a new damper ($85).
Source: http://www.houselogic.com/home-advice/maintenance-repair/spooky-house-noises-bad-smells/#ixzz29ZfTASQD
Thursday, October 11 2012
Halloween cleanup can be the scariest thing about the holiday. Here’s a tip sheet on how to remove eggs, toilet paper, wax, and other messes that go bump in the night.
But when the fun is over, the cleanup begins. Here are some tips from the American Cleaning Institute and others on removing the Halloween mayhem that little tricksters leave behind.
Egg splatters on your house
Time is your enemy when your house has been egged, because sunbaked yolks can stain your siding. Also, micro-shards of shell can become embedded in paint or act as an abrasive when you clean off the gunk.
Instead of scrubbing, spray away the egg with your garden hose. But don’t aim the hose full blast at the yolk, which will splatter the mess. Instead, Popular Mechanics magazine suggests first wetting the siding below the egg, then gently spraying the siding above the egg; the water will fall in sheets and flush away the mess.
If you need more cleaning oomph, dip a brush into a bucket of warm water (never hot, which will bake on yolks) and dish soap, and then scrub away the mess.
Toilet paper in your trees
Wet toilet paper is a beast to remove from trees. So wait until the sun evaporates dew; or, if rain is predicted, start removal right away.
Use a rake to grab and pull the TP down, a leaf blower to blast it, or a telescoping reacher/grabber to pluck it.
Start at the top and work your way down. Immediately throw paper away: Leaving it on your lawn can smother grass.
Candle wax on the carpets
Never try to remove hot wax from carpeting. Not only can you burn yourself, but you’ll likely spread the wax, making a bigger mess.
When the wax has cooled, break it with a dull knife or Popsicle stick. Throw away the pieces.
Cover remaining bits with a paper towel or rag, and press a warm iron to the area. Replace the towel frequently to avoid spreading the wax.
Halloween makeup on upholstery and carpet
Many commercial carpet and upholstery cleaners remove makeup from unwanted places. The only tricky part is applying these cleaners.
Always test the cleaner on an inconspicuous spot. Apply a dab of cleaner on a white cloth, then hold it to the test area for about a minute. If no color is transferred to the white cloth, the cleaner is safe.
Never rub cleaner on a stain. Rather, blot the stain starting from its outer edge and work to the center.
Source: http://members.houselogic.com/articles/egging-toilet-papering-how-clean-after-halloween-pranks/preview/
Thursday, September 27 2012
Choosing a color for your repainting job is harder than it seems. Follow these suggestions in picking the right paint color to make sure that you can achieve the look that you want for your home.
Any home decorator will tell you that repainting is one of the fastest and most affordable ways to radically change the look and feel of a room. With just the right shade, a room can feel anywhere from warm and welcoming to cool and tranquil.
Don’t take this task too lightly, though; choosing a color of paint is perhaps the trickiest part of redesigning a home. You only need to look at a an entire set of paint chips to realize that picking one out of a fishbowl is not the way to go with this. If you want to make sure that you select the right hue, pay attention to these tips.
1. Determine what kind of mood you want the room to have. Each room in the house might represent a certain feeling you want people to experience in them, so choose carefully. For instance, if you like having people over for meals all the time, go for bright colors to evoke warmth. Family rooms are made for relaxing, so blues and greens may work best for them.
2. Choose a certain object that you plan on keeping in the room and draw inspiration from it. Whether it’s a pillow or a piece of art, it can serve as your basis for the main color of the room. If you want, you can also use this color in different saturation levels by looking up its “family” in paint samples in the hardware store.
3. Consider the room’s lighting when choosing colors. Different colors project various effects when exposed to certain kinds of light, so make sure that you take into account the kind of light you have or plan to install. Incandescent lights accentuate yellow and other warm tones, fluorescent lighting tends to shed an intense bluish hue and daylight presents colors in their proper forms.
4. Use a color wheel. A color wheel displays hues according to what complements them the most. You can use it as your guide in knowing which colors go together and which ones don’t.
5. Don’t forget the ceiling. A white ceiling can be a bit distracting if your walls are a different color. Make sure that, whatever color you use on the walls, you choose paint that’s a couple of shades lighter for the ceiling. To be sure that you’re still on the right track, consult a paint color strip or take the same paint that you used on the wall and add white to it to get a brighter tinge.
6. Select the right finish. One color can have various projections when you use different finishes for it. A matte or flat finish can work well for the wall itself, but use a semi-gloss or satin finish for the trim. This will not only add depth to a room, but will also create the impression of various textures in the same shade.
The most important advice that you can get when picking paint colors is to take your time in choosing the color you really want. You may reach the point of frustration in your quest to choose one shade, but what’s worse is if you start painting a room and stop halfway when you realize it’s not the look you were going for in the first place.
Source: http://www.myproperty.ph/en/article.aspx?artid=380
Wednesday, September 26 2012
It’s an excellent all-purpose cleaner, deodorizer, stain remover, and descaler.
Vinegar is a ubiquitous item in many kitchens, and savvy householders know that it has many uses
beyond recipes. It’s also an excellent all-purpose cleaner, deodorizer, stain remover, and descaler.
Distilled white vinegar tends to be the most effective for these purposes, although some people prefer
apple cider vinegar or rice vinegar for personal care. Strongly flavored dark vinegars like balsamic
should be reserved for recipes.
One classic use for vinegar is in cleaning. Used straight or in a one to one dilution, it can be used to
wipe down a variety of surfaces to remove grime without leaving streaks or buildup. Windows, hard
floors, counters, ceramic, and metal appliances can all benefit from a wipedown with vinegar to keep
them clean and polished. Heavier concentrations can be useful for locations like shower tile, where the
acidic vinegar can be used to remove scale from hard water.
For slow or smelly drains, pour vinegar down the drain and flush with hot water. You can also make
a more aggressive drain deodorizer by pouring a mix of baking soda and vinegar down the drain to
agitate material caught on the walls of the pipe, flushing it out to leave the drain smelling more fresh
and moving more quickly.
Stains also tend to be very responsive to vinegar. For marks including stains from pens (beware: vinegar does not always work for ink stains), mildew, glues, and gums in carpeting, on walls, and on furniture, try blotting with vinegar and a clean cloth to gently remove the mark. The fresher the stain, the more successful you will be. On clothing, many stains including tough red wine and other bold colors can be eradicated if they’re blotted with vinegar within 24 hours. Gently pat the stain with a dampened towel to remove it, and run the garment in a wash with cold water and more vinegar to remove any clinging remains.
Adding a cup of vinegar to the last rinse on the laundry can help if clothes have been emerging stiff and scratchy. The vinegar cuts through soaps and hard water to flush them out of fabric, making it soft and smooth. This is especially useful for baby clothes, which can irritate sensitive skin if not thoroughly
rinsed. The vinegar also acts as a deodorizer, a concern with gym equipment and other heavily soiled
laundry.
For people with hard water or hair that’s accumulating residue from soaps, try rinsing with vinegar and
cool water at the end of a shower to help the hair stay soft and shiny. Vinegar can also be blotted on
itchy or sunburned skin to soothe it, and it can be effective for insect stings as well. If you’re working
in a smoky environment or around foods like onions, try wearing a rag soaked in vinegar over your
nose and mouth to help yourself breathe more easily. Vinegar can also be used to flush the eyes if
they’re red and irritated, but if the irritation persists for more than a day, consult a doctor!
There are even uses for vinegar outdoors! If you have a patio or walkway that’s getting slippery with
moss in winter or has a lot of weeds, use straight vinegar and a scrub brush to clean it and scour the
surface so it will be safer. If your soil is highly alkaline and you want to grow acid-loving plants like
rhododendrons, you can add some vinegar to the soil to up the acid content. Make sure to use a soil test first to make sure you’re adding an appropriate amount, because excessively acidic soil can damage the plants instead of helping them uptake nutrients.
Source: http://www.networx.com/article/household-uses-for-vinegar?utm_campaign=homeimprovement&utm_source=twitterfeed&utm_medium=twitter
Thursday, September 20 2012
Grout
 Most grout stains are surface stains. Try sandpaper or a Magic Eraser-type sponge to remove them. (Even a pencil eraser works well.) Most grout stains are surface stains. Try sandpaper or a Magic Eraser-type sponge to remove them. (Even a pencil eraser works well.)
If you still have stains, try a grout cleaner or a mix of bleach and water. Make sure you're in a well-ventilated area and wear gloves to protect your skin.
Bathtubs
Vinegar is a great cleaning agent for baths. Using a spray bottle, spray vinegar all over the tub. Leave for 15 minutes, then wipe down the tub and rinse.
For stubborn stains, try a mix of lemon juice, baking soda, and vinegar. Work the paste over the stains with a sponge and rinse.
Sinks
Mix 1 cup baking soda with 1/2 cup Borax. Sprinkle in the sink and scrub with a sponge. The mixture is a natural and mild abrasive that will lift any stains.
Wood Cabinets
To clean and rejuvenate wood cabinets, try a solution of equal parts vinegar and water. Use a sponge to remove grease and buildup. (Avoid using steel wool or scrub brushes since they can damage the cabinets' finish.) A paste of water and baking soda can be applied to remove any stubborn stains.
To restore shine, try a mix of 1/4 cup olive oil and 1 cup vinegar. Using a spray bottle, spray your cabinets with the solution and buff with a soft cloth.
Source: http://tinyurl.com/9dxdj2d
Thursday, August 23 2012
Some of us have decided that life is too short to spend any time behind a lawnmower. Others decide that the real reason we have a mate is so that we can offer him or her the opportunity to get out in the fresh air and sunshine…to mow. Children can be the recipients of that very same opportunity, which will build character through hard work. Alternatively, a healthy lawn – especially a well-watered one in late August – provides an opportunity to keep the Evansville economy humming by employing a gardening service to keep it in top trim.
But for those of us who personally oversee our property’s greenbelt maintenance, earlier this month, CNN’s Money website put together a four-point tip sheet that caught my eye: it rounded up some of the best common sense lawn care ideas I’ve seen in one place. The author (Josh Garskot who wrote in @Money), claims that DIY lawn care keeps him handy and youthful. Although I could argue that a tall lemonade on the verandah might serve just as well, here’s a shortened version of what he came up with:
· Edge twice. That is, turn the edger sideways to make a vertical slice, then do the regular horizontal trim (CNN even has a tip for precutting trimmer strings and keeping them at hand by attaching them with Velcro tape – but that’s a little too far into the weeds for me).
· Let the pros fertilize. Seen as just too complicated to handle, CNN’s expert threw in the towel when it comes to trying to figure out those charts on the back of the bags. Recommendation: hire pros to fertilize (and aerate once a year). I concur.
· Forget bagging clippings. Downside: since you probably remember the fact that you should never cut more than a third of the height of the grass, you have to mow often enough to follow through on that. Upsides: the clippings will be short enough that you can just let them recycle back into the soil. And your property will look great all the time!
· Say goodbye to stale gas. Particularly after a long layoff, old gas can mean real arm-wrenching trouble getting a stubborn motor started. A few drops of fuel stabilizer is enough to keep mower and trimmer carburetors ungummed (and the air free of the bad language that can otherwise result).
Lawns can be a real property value enhancer when they’re well maintained -- but the opposite when allowed to reach meadow length. And while we’re on the subject, I hope you will always feel free to contact me whenever you’d like to tap into my store of home maintenance referrals and ideas for keeping yourEvansville property at the top of the market. You can reach me on my cell phone at 812-499-9234.
Monday, August 20 2012
Conduct a do-it-yourself home security check by walking around your house to assess what needs to be done to reduce the risk of a break-in.
1. Keep your home well-maintained on the outside.
Burglars want an easy target. Stand on the street outside your house and ask yourself: Does my property look neglected, hidden, or uninhabited? A front door or walkway that’s obscured by shrubbery offers crooks the perfect cover they need while they break a door or window. To improve security, trim shrubs away from windows and widen front walks.
2. Install motion detector lights.
All sides of your house should be well-lit with motion-activated lighting, not just the front. Simple motion-activated floodlights cost less than $50 each, and installing them is an easy DIY job if the wiring is already in place.
3. Store your valuables.
Thieves want easy-to-grab electronics, cash, jewelry, and other valuables, though some are not above running down the street with your flat-screen TV. Most make a beeline for the master bedroom, because that’s where you’re likely to hide spare cash, jewelry, even guns.
Tour each room and ask yourself: is there anything here that I can move to a safe deposit box? Installing a home safe ($150 to $500) that’s bolted to your basement slab is a good repository for items you don’t use on a daily basis.
4. Secure your data.
While you probably won’t be putting your home computer in a safe anytime soon, take steps to back up the personal information stored on it. Password protect your login screen, and always shut off your computer when not in use (you’ll save energy, too!) Don’t overlook irreplaceable items whose value may hard to quantify, like digital photos.
5. Prepare ahead of time in case the worst happens.
- Take a photo or video inventory of items of value in your home, and store the file online or in your home safe.
- Check that you’re properly insured for theft. Note that high-ticket items in your home office, such as computers, professional camera equipment, or other business essentials, may require an additional rider or a separate policy.
Source: http://members.houselogic.com/start/??nicmp=rcrim&nichn=editorial&niseg=rmonews
Friday, August 10 2012
Find out which remodeling projects will provide the biggest bang for your buck this year, according to Remodeling magazine.
Optimizing the use of space in a home will not only attract buyers but also give sellers more bang for their buck, according to Remodeling’s “2011–12 Cost vs. Value Report,” conducted in cooperation with REALTOR® Magazine and NAR’s HouseLogic.com.
An attic bedroom addition costing $50,148 was expected to recoup 72.5 percent of the cost nationally—inching up 0.3 percent from the 2010–11 report. The minor kitchen remodel also fared well, returning an estimated 72.1 percent of the nearly $20,000 job cost.
The report looks at the estimated cost and expected resale return of 35 midrange and upscale remodeling projects in 80 markets. The estimated costs and returns were derived from a survey of more than 3,000 REALTORS® conducted last summer. As in past years, REALTORS® picked exterior projects to recoup the most at resale. Among those, new fiber-cement siding was expected to provide the highest return, recouping an estimated 78 percent of the $13,461 cost.
Top 6 Returns
Siding Replacement (upscale) - fiber-cement
Job Cost: $13,461
Resale Value: $10,493
Cost Recouped: 78%
Entry Door Replacement - steel
Job Cost: $1,238
Resale Value: $903
Cost Recouped: 73%
Attic Bedroom Addition
Job Cost: $50,148
Resale Value: $36,346
Cost Recouped: 72.5%
Kitchen: Minor Remodel
Job Cost: $19,588
Resale Value: $14,120
Cost Recouped: 72.1%
Garage Door Replacement
Job Cost: $1,512
Resale Value: $1,087
Cost Recouped: 71.9%
Garage Door Replacement (upscale)
Job Cost: $2,994
Resale Value: $2,129
Cost Recouped: 71.1%
Remodeling’s2011-12 Cost vs. Value Report ©2011 by Hanley Wood, LLC. Republication or redissemination of the Report is expressly prohibited without written permission of Hanley Wood, LLC.“Cost vs. Value” is a registered trademark of Hanley Wood, LLC.Visit www.costvsvalue.com for information on all 35 projects. There, you can also download a free PDF providing information on average cost and resale value nationally, regionally, and in a specific market. Estimates for construction costs were compiled by HomeTech Publishing.
Tuesday, August 07 2012
1. Keep your home well-maintained on the outside.
Burglars want an easy target. Stand on the street outside your house and ask yourself: Does my property look neglected, hidden, or uninhabited? A front door or walkway that’s obscured by shrubbery offers crooks the perfect cover they need while they break a door or window. To improve security, trim shrubs away from windows and widen front walks.
2. Install motion detector lights.
All sides of your house should be well-lit with motion-activated lighting, not just the front. Simple motion-activated floodlights cost less than $50 each, and installing them is an easy DIY job if the wiring is already in place.
3. Store your valuables.
Thieves want easy-to-grab electronics, cash, jewelry, and other valuables, though some are not above running down the street with your flat-screen TV. Most make a beeline for the master bedroom, because that’s where you’re likely to hide spare cash, jewelry, even guns.
Tour each room and ask yourself: is there anything here that I can move to a safe deposit box? Installing a home safe ($150 to $500) that’s bolted to your basement slab is a good repository for items you don’t use on a daily basis.
4. Secure your data.
While you probably won’t be putting your home computer in a safe anytime soon, take steps to back up the personal information stored on it. Password protect your login screen, and always shut off your computer when not in use (you’ll save energy, too!) Don’t overlook irreplaceable items whose value may hard to quantify, like digital photos.
5. Prepare ahead of time in case the worst happens.
- Take a photo or video inventory of items of value in your home, and store the file online or in your home safe.
- Check that you’re properly insured for theft. Note that high-ticket items in your home office, such as computers, professional camera equipment, or other business essentials, may require an additional rider or a separate policy.
Source: http://members.houselogic.com/articles/do-it-yourself-home-security-check-5-essential-steps/preview/
Friday, August 03 2012
Want to put a little pep in your porch? Here are 5 budget-friendly ways to add value and get more enjoyment out of your front-facing outdoor space.
Sprucing up your porch is more than a cosmetic upgrade — it’ll boost your curb appeal and help preserve the value of your home. As a bonus, you’ll even get some neighborhood bragging rights. Here are five simple porch pick-me-ups, each costing less than $500.
1. Adding architectural pizzazz
Sweeten your porch’s appearance with a wide variety of architectural trim pieces in weather-resistant wood or low-maintenance synthetics (PVC or polyurethane). They’re readily available at home improvement centers.
Most porch trim pieces install with nails or screws and require basic tools and moderate do-it-yourself skills. Or, hire a handyman for a few hours at $30-$60 an hour.
- Add decorative brackets (starting at $20 each) where support posts meet the ceiling.
- Span the space above porch stairs with a fancy fretwork spandrel ($200 for 6 feet).
- Shapely corbels ($30 and up) lend charm under the eaves.
2. Painting the floor
You’re walking on sunshine when you splash color on a porch floor. Use good-quality exterior paint made for porch floors ($30-$45 per gallon) and follow the manufacturer’s guidelines for prepping the surface so the paint won’t peel.
If the old paint dates prior to 1978, find out if the paint is lead-based. If necessary, remove lead paint.
Once the basecoat dries, you can add a painted design, such as a faux rug, using stencils. Or outline your motif with quick-release painter’s tape to ensure crisp edges.
3. Fanning a breeze
Stir up your own cooling breezes by adding a ceiling fan to your porch. Be sure to select a ceiling fan model designed for outdoor use ($75-$250).
Wiring a fan is a task you can do yourself in less than an hour if there’s an existing electrical box and you have the right electrical tools. Or, hire an electrician ($75-$200) to wire the fan.
4. Creating privacy
If your exposed porch leaves you feeling like a goldfish in a bowl, add home privacy using one or more of these makeover strategies:
Louvered shutters: Tall louvered panels, or shutters, filter light while allowing breezes to blow freely across your porch. Select shutters in wood, vinyl, or PVC; prices start at about $50 for a 12-by-64-inch shutter.
Install one or more shutters floor-to-ceiling or just above the rail to create a private spot on the porch. You’ll need an afternoon to install shutters, typically by securing wood cleats to the floor and fascia and fastening the shutters to the cleats with screws.
Outdoor fabric: Add a little romance, color, and pattern to your porch with fabric panels that draw closed for privacy. Weather-resistant curtain panels with grommet tops come in a variety of lengths, and start at about $60 per panel.
You’ll need a few hours to install a rod ($50 for a wrought-iron rod that extends to 130 inches) and hang the panels. Or, buy weather-resistant fabric (starting at about $10 per yard) and make your own panels.
Lattice: Like shutters, lattice panels allow filtered light and breezes onto your porch, while obscuring the view. You can install several panels in an afternoon using standard tools and fasteners. A 4-by-8-foot wood lathe lattice panel costs about $20. Decoratively patterned lattice PVC panels start at about $30. Visit a home center to find prebuilt wood or PVC privacy panels with custom looks, starting at about $200.
Plants: For botanical beauty, add a lush, living privacy screen. Trail flowering vines, such as fast-growing morning glory ($2 for a seed packet) or clematis ($15), up lattice panels; or plant tall but narrow-spreading evergreen, such as Thuja Green Giant ($100 for an 11-foot tree), beside the porch.
You can also use tall container plants on the porch and move them around where needed. Bamboo (about $40 for a 3-gallon container) grows quickly and provides leafy, light-filtering beauty.
5. Screening it in
Ban buzzing pests from your porch haven with screens. Use porch railings as the frame for supporting screens and staple screens in place. Use thin lathe strips or molding to cover staples and the screen edge.
Or, build frames using ¾-inch-thick, pressure-treated lumber. You can build a 6-by-6-foot frame for less than $15. Stretch the screen across each frame and staple it in place. A 100-foot roll of 4-foot-wide patio screen starts at about $55.
Mosquito curtains are another option that you can install yourself on a sliding track in 5 or 6 hours. Floor-to-ceiling curtains (less than 10 feet tall), which cover a 25-foot wide span, plus the track and hardware, cost about $475.
Read more: http://www.houselogic.com/home-advice/home-improvement/porch-ideas/#ixzz22J3BBq23
Thursday, July 26 2012
You change your car's oil every 3,000 miles or so, get your teeth cleaned regularly, and rebalance your investments once a year. So why wouldn't you undertake similar preventive maintenance on your house?
Having to replace just one of its hardest-working surfaces -- from roofing to exterior paint, hardwood floors to lawn -- would cost you thousands. But you can stave off that pain with simple, often-overlooked upkeep procedures and slight tweaks to the way you already approach routine chores.
Exterior paint: The biggest controllable threat to the paint on your house is the landscaping around it, says architect Karen Sweeney, director of facilities for two Frank Lloyd Wright buildings in Chicago.
Overgrown foundation plantings rub away paint -- and bring moisture and bugs onto the finish.
The fix: Prune bushes to keep them at least a foot away from the house; a landscaper might do it for $200 if he's already there.
Roofing: You can't stop nature from damaging your roof, but you can address the harm coming from within by adding ventilation to your attic. Without proper airflow, that space can get 35° to 55°F hotter than the outside temperature, roasting the roof from below.
The fix: Have a contractor add airflow by installing high and low attic vents; they can go in the walls or the roof itself, depending on the situation ($500 to $1,000).
Hardwood floors: Every grimy boot and dragged chair brings you closer to the day when you'll have to refinish the floors. "But sanding floorboards makes them a little thinner, bouncier, and creakier," says Sweeney. "And after three times there's nothing left to sand."
The fix: Hire a floor guy to "
But in the North, grass shorter than 2½ to 3½ inches is less drought resistant and invites insects and weeds (in the South, one inch is fine).
The fix: Set the mower higher and never remove more than a third of the grass height at a time. Says Stier: "Think of mowing as a trim, not a crewcut."
," or sand away most of the old finish -- without touching the wood -- and apply new polyurethane ($1,000 to $1,500 for a typical first floor, half the cost of refinishing).
Lawns: Many DIYers and pros do the grass serious harm when they mow.
"People like the look of a close-cropped lawn," says University of Tennessee agriculture professor John Stier, a consultant to Major League Baseball grounds crews.
Source: http://money.cnn.com//2012/07/17/real_estate/home-repair.moneymag/index.htm?section=money_realestate&utm_source=feedburner&utm_medium=feed&utm_campaign=Feed%3A+rss%2Fmoney_realestate+%28Real+Estate%29
Monday, July 23 2012
July tends to be a busy month in most Evansville homes. If you have kids who are out of school, it’s up to you to dream up new ways to keep them out of trouble (and away from non-stop video gaming). Even if kids are not at homes, you probably have to get twice as much done anyway – you want to be ahead at work and around the house so you can relax and enjoy your vacation. Or recover from it.
And then there is the likelihood that in the back of your mind is the knowledge that you’ve been putting off what should be an annual maintenance once-over. All homes have areas that need looking after, and July and August are the best time to get at them. On dry days that aren’t too blisteringly hot to work, it’s prime time to fix areas that the year’s wear and tear may be turning into future problems.
Warm weather is perfect for conducting a timely energy audit. Any gaps or cracks around doors or windows - the likely culprits if heat leakage raised last winter’s energy bills - can most easily be filled in warm weather. Other possible spots where heat can leak is the junction between different materials, and around fireplace dampers. If you’re a dedicated DIYer, grab some caulk or other professional-grade material and get filling. If you’re less handy, the energy audit may suggest a call to an appropriate professional. A review of the year’s energy bills will tell you whether that makes dollars and sense.
This is the time to pay attention to the big one: the foundation. It’s prudent in all homes to clean visible concrete surfaces. Sidewalks and steps can be cleaned very effectively with the same pressure washer you use to clean your car. When it comes to the foundation, be sure to check for cracks, water or mold.. If mold or water is present, a trusted contractor or structural engineer will be able to recommend a solution that prevents real trouble later.
Summer is also a good time to take a look at your home’s deck or patios. Standing water rots wood. The solution can be as simple as slipping planter "feet" beneath outdoor flower pots. As long as water is able to flow around or under stationary objects, the underlying wood will benefit.
These are only a few examples of what you can make part of your summer home maintenance checklist. Call me anytime with home and maintenance-related questions, if you need a recommendation for a reliable local contractor or service provider, or if you want to check on the status of the Evansville homes market in your neighborhood. You can reach me on my cell phone at 812-499-9234.
Thursday, July 12 2012
Look to the walls! Homeowners preparing Evansville houses for sale can hesitate when they suspect the overall look and feel of the interior has grown dated. With good reason, they may fear that prospective buyers will be drawn to newer, fresher-looking competitors…yet the cost and delay of all-out remodel is unattractive.
One alternative is to ‘look to the walls’ for an easy and budget-friendly alternative to a complete remodel. Few things can date a home the way old wallpaper does. Unfortunately, just painting over it is not a solution that usually works very well. Let’s face it: the old paper has to go!
While many newer types come off with ease, it can be downright difficult to remove old wallpaper. Those paisley daisies can be stubborn! Furthermore, many old homes have several layers, making the process even more daunting. Like any of the other processes involved in prepping houses for sale, this one will go considerably faster if you keep the end goal – the major increase in value – in mind.
If the offending wallpaper is a non-porous material like vinyl, start by making holes in it with a puncturing roller, handsaw blade, or even just rough sand paper. The holes will allow steam or chemicals to get through to the glue – it’s what you are working to neutralize. A wallpaper steamer helps ease wallpaper away by melting the glue that bonds it to the wall. You can usually find this specialty equipment for sale or rent at one of our Evansville hardware stores or home centers.
Another method is to spray or sponge on one of the several chemical solutions that dissolve the old bonding glue. Most of these preparations soak for about 15 minutes before removal. Alternatively, there is the least expensive option -- one that I find is usually just as effective. This is a one-to-one solution of fabric softener and hot water (the ‘hot’ is important). Combine the ingredients in a spray bottle, then spray directly onto the wall. This mixture works best when made in small batches that keep the water hot enough to melt the glue.
Once the bond is loosened, starting in a bottom corner, pull upward, using a putty knife as needed to ease the paper away from the wall surface. After the paper is down, the best cleaning solution is regular dish detergent preceding a water rinse and towel dry. (In case I forgot to mention it, work clothes are a requirement for this project: old work clothes!)
Do-it-yourself projects like this considerably lower the cost of updating Evansville houses for sale…especially when compared with the alternative of hiring a pro. If you’re looking for more ideas on how to modernize and refresh your home before listing it for sale, don’t hesitate to give me a call. Together, we can develop a pre-marketing plan that works for you! You can reach me at 812-499-9234.
Wednesday, June 13 2012
Just another weekend? Not if you take advantage with one or more of these 5 great projects you can easily pull off for under $300.
Project #1: Add a garden arbor entry.
The setup: Install an eye-catching portal to your garden with a freestanding arbor. It’ll look great at the end of a garden path or framing a grassy area between planting beds.
Specs and cost: Garden arbors can be priced up to thousands of dollars, but you can find nice-looking kits in redwood, cedar, and vinyl at your local home improvement or garden center for $200-$300. Typical sizes are about 7 feet high and 3-4 feet wide. You’ll have to assemble the kit yourself.
Tools: Screwdriver; cordless drill/driver; hammer; tape measure. Kits come pre-cut and pre-drilled for easy assembly, and usually include screws. If fasteners aren’t included, check the materials list before you leave the store.
Time: 3-5 hours
Project #2: Install a window awning.
The setup: Summer is super, but too much sunlight from south- and west-facing windows can heat up your interiors and make your AC work overtime. Beat that heat and save energy by using an awning to stop harsh sunlight before it enters your house.
Specs and cost: Residential awnings come in many sizes and colors. Some are plastic or aluminum, but most are made with weatherproof fabrics. They’re engineered for wind resistance, and some are retractable. A 4-foot-wide awning with a 2.5-foot projection is $150-$250.
Tools: Cordless drill/driver; adjustable wrench; tape measure; level. You can install an awning on any siding surface, but you’ll need a hammer drill to drill holes in brick. To prevent leaks, fill any drilled holes with silicone sealant before you install screws and bolts.
Time: 3-4 hours
Project # 3: Screen off your air conditioner from view.
The setup: Air conditioning is great, but air conditioner condensers are ugly. Up your curb appeal quotient by hiding your AC condenser or heat pump unit with a simple screen.
Specs and costs: An AC screen is typically 3-sided, about 40 inches high, and freestanding — you’ll want to be able to move it easily when it comes time to service your HVAC. For about $100, you can make a screen yourself using weather-resistant cedar or pressure-treated wood to build 3 frames, and filling each frame with plastic or pressure-treated lattice.
Or, buy pre-made fencing panels. A 38-by-38-inch plastic fencing panel is about $50.
Tools: Hammer; saw; cordless drill/driver; measuring tape; galvanized wood screws.
Time: Build it yourself in 4-6 hours. Install pre-made fencing in 1-2 hours.
Project # 4: Add garage storage.
The setup: Shopping for garage storage solutions is definitely a kid-in-the-candy-store experience. There are so many cool shelves, hooks, and hangers available that you’ll need to prioritize your needs. Take stock of long-handled landscape tools, bikes, paint supplies, ladders, and odd ducks, such as that kayak. Measure your available space so you’ll have a rough idea of where everything goes.
Specs and cost: Set your under-$300 budget, grab a cart, and get shopping. Many storage systems are made to be hung on drywall, but hooks and heavy items should be fastened directly to studs. Use a stud finder ($20) to locate solid framing.
If your garage is unfinished, add strips of wood horizontally across studs so you’ll have something to fasten your storage goodies to. An 8-foot-long 2-by-4 is about $2.50.
Tools: Cordless drill/driver; hammer; level; measuring tape; screws and nails.
Time: This is a simple project, but not a fast one. Figure 6-10 hours to get everything where you want it, plus shopping. But, oh the fun in putting everything in its place!
Project #5: Edging your garden.
The setup: Edging is a great way to define your planting beds, corral garden mulch, and to separate your lawn from your garden or patio.
Specs and cost: Wood and metal edging looks like tiny fencing; they’re 4-6 inches high. Some include spikes that hold the edging in position; other types must be partially buried. Cost is $1-$5 per foot.
Plastic edging can be molded and colored to mimic brick, wood, and stone. About $20 for 10 feet.
Concrete edging blocks are smooth, or textured to resemble stone. $15-$25 for 10 feet.
Real stone edging is installed flush with the surrounding grade in a shallow trench on a bed of sand, so digging is required. Stone is sold by the ton and prices vary by region. You’ll need about one-third of a ton of flagstone to make an 8-inch-wide edging 50 feet long, costing $150-$200.
Tools: Shovel; wheelbarrow; tin snips (for cutting plastic edging); work gloves.
Time: Pre-made edging will take 2-3 hours for 50 feet; stone will take 6-10 hours.
Source: http://members.houselogic.com/articles/diy-weekend-projects-for-home/preview/
Tuesday, May 22 2012
It doesn’t have to cost a fortune to improve a home and make it more sellable, according to HomeGain’s 2012 National Home Improvement Survey.
HomeGain surveyed nearly 500 real estate professionals nationwide to determine the top do-it-yourself home improvement projects that offers some of the biggest bang for your buck when selling a home.
“In a buyer’s market, sellers need to dress their homes for success before putting them on the market,” says Louis Cammarosano, HomeGain’s general manager. The survey shows “that do-it-yourself home improvements like cleaning and de-cluttering and lightening and brightening your home are cost-effective ways of increasing your chances of selling faster and closing closer to the asking price than homes rushed to the market with no improvements.”
Here are the top five projects that real estate professional recommend to their clients–projects that have the potential to offer some of the highest returns on investment at resale, according to the 2012 HomeGain survey:
1. Clean and declutter
What to do: “Removing personal items; wash and clean all areas of inside and outside of house; freshen air; remove clutter from furniture, counters, and all areas of the home; organize closets; polish woodwork and mirrors.”
Estimated cost: $402
Potential ROI: 403% or $2,024 to the home’s sale price
2. Lighten and brighten
What to do: “Open windows; clean windows and skylights inside and outside; replace old curtains or removing curtains; remove other obstacles from windows blocking light; repair lighting fixtures; make sure window open easily.”
Estimated cost: $424
Potential ROI: 299% or $1,690
3. Repair electrical and plumbing
What to do: “Update leaky or old faucet spouts and handles; repair leaks under bathroom or kitchen sinks; laundry room pipes; toilets should be in good working condition; remove mildew stains.
“Update electrical with new wiring for modern appliances and/or Internet and other audio/visual equipment requested in homes today; door bell should work; service sprinkler systems; fix lights and outlets that do not turn on; replace old plug points with new safety fixtures.”
Estimated cost: $808
Potential ROI: 293% or $3,175
4. Landscaping
What to do: “Front and back yards; add bark mulch; rake and remove leaves, branches and debris; plant bushes and flowers; add planters and hanging plants; mow grass; water lawn and plants; remove weeds and dead plants; manicure existing plants; any yardwork that improves the curb appeal of a home.”
Estimated cost: $564
ROI: 215% or $1,777
5. Staging
What to do: “Add fresh flowers; removing personal items; reduce clutter; rearrange furniture; add new props or furniture to enhance room/s; play soft music; hang artwork in walls.”
Estimated cost: $724
ROI: 196% or $2,145
However, the survey finds that the home improvement projects that offer the highest potential price increase to a home’s resale value continues to be updating the kitchen and bathroom. Home sellers could potentially see a $3,255 price increase to their home at resale by tackling kitchen and bathroom projects, according to the HomeGain survey. But those projects aren’t usually cheap to do. Check out our post earlier this year about the 2011-2012 Cost vs. Value report to see what home remodeling projects offer the biggest potential returns at resale.
Source: http://styledstagedsold.blogs.realtor.org/2012/04/30/5-diy-projects-to-increase-sales-value-by-more-than-10000/
Tuesday, April 17 2012
As the saying goes: April showers bring May flowers! With more rain in the springtime months of April and May, now's the perfect opportunity to get your rain gutters in tip-top shape. As a homeowner, you're probably wondering what the best way would be to maintain those gutters and I've got the answer for you! We have compiled a handy list of tips that will help you to save money by doing it yourself, so that you can simply enjoy the rain once it comes.
If you need any additional tips, please feel free to call me Rolando at 499-9234 or Kathy at
499-0246. Also if you have friends or family who are in need of real estate service or advice, we hope you'll give them our name. We are always happy to help!
FIVE TIPS FOR SAFELY CLEANING YOUR RAIN GUTTERS
· Maintenance means everything: Ideally, you should clean your gutters twice per year. Maintaining clean gutters will help you to avoid drainage problems that could potentially lead to more costly repairs.
· Climb on up: Borrowing (or investing in) a good, sturdy ladder is the key to ensuring your personal safety and to making the task as hassle-free as possible. Make sure that the ladder is placed on a flat, steady surface, and follow the rule of two: never stand on the top two rungs of a ladder, as it becomes very difficult to maintain your balance.
· Protect yourself: Thick, heavy gloves are a must when performing this kind of task. Gutters may have sharp or jagged metal pieces as well as screws or nails that may pose a danger to your hands and fingers. Want additional protection? Safety glasses are also a good idea!
· Up on the roof: Santa might find rooftops to be a walk in the park, but for the rest of us, they aren't generally ideal perches. However, if you have a flat roof or a roof with a low slope, you may find it easier to accomplish the cleaning by situating yourself up top. Always use extreme caution, wear non-slip shoes and never opt for this choice in bad weather!
Scoop, blast and repair: Once you're ready to start cleaning, follow a simple three-step process to get the most out of the task. Scoop out any debris, blast the drains clean with a high-powered hose, and repair any leaks you may find along the way.
Thursday, March 22 2012
Nothing ruins your garden or yard like weeds, those uninvited guests that rob your plants of space and nutrients. So murder those weeds most foul, but without harmful chemicals that can do you in, too.
Here are 7 ways to kill weeds with weapons you already have around your house.
1. Newspaper: A carpet of newspaper, which blocks sunlight and oxygen from reaching the soil, will smother weeds already sprouted and prevent new ones from growing. Throw down newspaper in 10-sheet layers, wet to hold it down, and cover with an inch or two of mulch. If weeds begin to grow in the mulch, add more layers, making a mulch-newspaper lasagna, which eventually will decompose and nourish the soil.
2. Old shower curtains and carpet samples: Spreading these useless items in garden paths or between rows will keeps weeds from ever showing their unwanted heads. Cover with mulch.
3. Corn gluten meal: This corn by-product stops seeds from growing into weeds. Since the meal will prevent germination, spread it around established plants, and after seedlings and transplants have taken hold in the soil. After harvest, spread the meal to prevent late-season weeds.
4. Vinegar: The acetic acid in 5% vinegar is a desiccant that sucks the life out of plant leaves. It’s most destructive to young plants with immature roots, though it just rolls off weeds with waxy leaves, like pennywort or thistle.
Make sure you cover desirables before spraying, because vinegar is an equal opportunity killer. Keep your spray on-target by removing the bottom from a 2-liter plastic soda bottle, and placing it over the weed. Spray vinegar into the mouth of the bottle, which will keep it from splattering on your vegetables.
5. Vodka: Don’t know if vodka makes weeds fall down dead or drunk, but 1 ounce mixed with 2 cups of water and a couple of drops of dish soap will dry out weeds that live in the sun. Doesn’t work that well on shade-loving weeds. Protect desirables, because vodka will dry them out, too.
6. Soap: The oil in soap can break down waxy or hairy weed surfaces, making them vulnerable to desiccants. So add a few drops of liquid dish detergent to vinegar or vodka sprays to keep the solution on leaves. The soap also makes leaves shiny, which will help you keep track of what you’ve sprayed.
7. Boiling water: After you’ve made yourself a cup of tea, take the kettle outside and pour the boiling water on weeds, which will burn up. This is a particularly good way to whack driveway and walkway weeds, because the boiling water can run off impervious surfaces and cool before it reaches border plants.
Read more: http://www.houselogic.com/home-advice/landscaping-gardening/how-to-get-rid-of-weeds-naturally/#ixzz1pgaGDfcJ
Friday, March 16 2012
There's time this month to do the prep work before the planting and growing season gets going.
March may find you sighing with impatience as you watch yet another snowfall cover your barren container boxes, but it's one of the most important months for gardeners.
There's still time to do all of your prep work, from honing tools to starting seeds, as you imagine the shapes, tastes and colors of your next garden. Spring begins with the vernal equinox on March 20.
Tool cleanup
If you didn't do so in the fall, it's time to give your lawn mower and other tools some tough love.
Get ahead of the spring crowds by dropping off your lawn mower now to have the oil changed, bolts tightened and blades sharpened.
Remove soil from your tools' metal parts using sandpaper or a hose.
- Sand rough edges on wooden tool handles, then coat them with linseed oil.
- Sharpen your tools. A file will sharpen tools of all sizes, from shovels and hoes to trowels and clippers. A Carborundum wheel will work on smaller tools. Pruning shears can be sharpened with a whetstone. After sharpening, use a rag to apply a thin, penetrating oil to metal tool parts; follow with a heavier oil on tools that have moving parts.
Lawn doctoring
The green, green grass of home doesn't get that way by accident, and March is a perfect time to assess your lawn's health.
- Pluck a 4- to 5-inch square from your yard to see what's going on down there. If your area has crane flies, count the larvae. Fewer than 35 per square foot means less work for you: Your lawn should be able to withstand that number.
- If you're not sure what to look for, take your lawn sample to an expert at your garden store and ask for a diagnosis; then just press your sample back into its "bed."
- Lime, treat moss and, finally, reseed as needed. (Overseeding can be done after midmonth.)
- Fertilize your lawn now or start a new lawn using seeds or sod.
Read more here: http://ht.ly/9yLMA
Monday, March 12 2012
You wouldn’t expect to run a 10-mile race after spending all winter on the couch drinking beer and eating potato chips. Likewise, too many of us neglect the health of our gas-powered lawn mowers then curse them come spring when they just say no. Here are six ways guaranteed to shorten the life of your mower from Consumer Reports' mowing expert Peter Sawchuk who is just back from conducting our mower tests in Florida.
Consider your mower’s fuel tank the perfect place to store old gasoline. Even without additives, stabilized gasoline will eventually gum up, clog fuel lines, and ruin your carburetor. And gas containing ethanol ages even more quickly. “It’s not so much the ethanol but that it absorbs a lot of water,” says Kris Kiser, president and CEO of the Outdoor Power Equipment Institute, a trade group. “Water in the engine is a killer.”
Smart move: At the end of the season, take 10 minutes to drain the tank or run the engine dry.
Never change or add oil. Moving metal parts need oil, and an engine that’s denied clean oil, and enough of it, will overheat for sure.
Smart move: The best time to do change the oil in a walk-behind mower is when it’s drained of gas—since you’ll need to flip the mower to remove the old oil.
The blades still turn, so forget about sharpening them. Ideally, you should sharpen your mower’s blades monthly—and even more often in the fall if you mulch leaves using your mower. This keeps the engine from working harder and less efficiently than it needs to, which affects its lifespan. But if you indeed forget, the brown-tipped grass will remind you before it dies altogether.
Smart move: You’ll need: A piece of 2x4 to wedge in the blade to keep it from turning (shown in photo) as you remove it. Sharpening costs about $10 if you don’t do it yourself.
Leave in your original air filter year after year. An engine’s carburetor needs to mix the gasoline with filtered air for smooth running, but the bigger hazard in not cleaning or replacing the filter annually is that a dirty or torn filter can allow dirt into the engine, which will accelerate wear and shorten its life.
Smart move: It costs about five dollars for the part and 30 seconds to put it in.
Ignore the engine’s cooling fins, even if they’re clogged with clippings. The cooling fins help distribute heat from the engine, which matters most on hot days. Let grass clippings and dust accumulate on them, and the engine could overheat.
Smart move: Running a whisk broom back and forth over the fins for a few seconds.
Don’t check the lawn for stationary hazards before mowing. Even if you know the location of every metal stake, sprinkler head, or tree stump, you could come upon a thick branch or jutting rock suddenly and hit it with the mower. Doing this with a walk-behind mower can bend the crankshaft. “If you bend the shaft, typically because of the price point of the product, it’s dead," says Kiser. “You’re just not going to get it repaired.”
Smart move: Take short walk and make a visual inspection before you mow.
There’s a seventh way to kill your mower as shown by Milwaukee homeowner Keith Walendowski when he took his shotgun to his Lawn-Boy a few years ago. But technically the mower was already gone—or at least needed a little TLC.
Source: http://news.consumerreports.org/home/2012/03/six-ways-to-kill-a-mower-and-what-to-do-instead.html
Thursday, March 08 2012
In our ongoing “Why You Should Fake It” series, we look at garage doors that give you the look of wood at a price point that’s easier to swallow.
Money’s tight these days, but your desire for nice things needn’t be stifled. That’s why we’ve been examining faux products in our “Why You Should Fake It” series.
Today’s topic: Fiberglass garage doors with the deluxe look of wood for a get-real price.
New die technology lets fiberglass doors mimic wood grains so closely that only a professional eye can tell the difference. But unlike wood, which is vulnerable to heat and water and must be painted or stained every few years, pre-finished fiberglass garage doors are impervious to the elements and require almost no maintenance.
Other plusses of fiberglass garage doors:
- Available in many prefinished colors
- You can paint them (but you’ll have to repaint every couple of years or so)
Although the energy efficiency of insulated fiberglass and insulated wood doors are practically the same, the initial cost can be worlds apart.
Most 16-by-7-foot fiberglass doors cost about $1,800 installed, while hardwood doors start around $2,500 to $3,000, then zoom up from there depending on wood and style. Your local garage door contractor can help you explore your faux door options.
What’s the downside of fiberglass garage doors? They can crack with age and are more expensive than other low-maintenance options, such as steel garage doors ($750 to $1,200).
Read more: http://www.houselogic.com/blog/garages/price-garage-doors/#ixzz1oScf6ks6
Friday, February 17 2012
A Factsheet on Home Electrical Fire Prevention
Electrical fires in our homes claim the lives of 280 Americans each year and injure 1,000 more. Some of these fires are caused by electrical system failures, but many more are caused by incorrectly installed wiring and overloaded circuits and extension cords.
The U.S. Fire Administration (USFA) would like consumers to know that there are simple steps you can take to prevent the loss of life and property resulting from electrical fires.
The Problem
During a typical year, home electrical problems account for 26,100 fires and $1 billion in property losses. About half of all residential electrical fires involve electrical wiring.
December and January are the most dangerous months for electrical fires. Fire deaths are highest in winter months which call for more indoor activities and increases in lighting, heating, and appliance use. The bedroom is the leading area of fire origin for residential building electrical fires. However, electrical fires that begin in the living room/family room/den areas result in the most deaths.
The Cause
- Most electrical distribution fires result from problems with "fixed wiring" such as faulty electrical outlets and old wiring. Problems with cords (such as extension and appliance cords), plugs, receptacles, and switches also cause many home electrical fires.
- Light fixtures and lamps/light bulbs are also leading causes of electrical fires.
- Many avoidable electrical fires can be traced to misuse of electric cords, such as overloading circuits, poor maintenance, and running the cords under rugs or in high traffic areas.
Safety Precautions
- Routinely check your electrical appliances and wiring.
- Frayed wires can cause fires. Replace all worn, old or damaged appliance cords immediately.
- Replace any electrical tool if it causes even small electrical shocks, overheats, shorts out, or gives off smoke or sparks.
- Keep electrical appliances away from wet floors and counters; pay special care to electrical appliances in the bathroom and kitchen.
- Buy electrical products evaluated by a nationally recognized laboratory.
- Keep clothes, curtains, and other potentially combustible items at least three feet from all heaters.
- If an appliance has a three-prong plug, use it only in a three-slot outlet. Never force it to fit into a two-slot outlet or extension cord.
- Don't allow children to play with or around electrical appliances like space heaters, irons, and hair dryers.
- Use safety closures to "child-proof" electrical outlets.
- Use electrical extension cords wisely; never overload extension cords or wall sockets.
- Immediately shut off, then professionally replace, light switches that are hot to the touch and lights that flicker.
Finally, having a working smoke alarm dramatically increases your chances of surviving a fire. And remember to practice a home escape plan frequently with your family
Source: http://www.usfa.fema.gov/citizens/home_fire_prev/electrical.shtm
Thursday, February 16 2012
Improving walls and ceilings is an excellent way to bring back the life of your home and great for maintaining equity on one of the biggest investments in your life.
Many of the wall upgrades can be handled by an experienced do-it-yourselfer with a bit of know-how and the time to undertake the projects.
If you have dents in the walls or ceilings and/or holes, you will need to have scrapers, plaster, knife, spackle, cloth, sandpaper and paint. You may also need the patches that come with plastering kits in the event some of the holes require additional attention.
Before you start with the spackling, make sure the area is clear of dust and other debris. Apply a coat of spackle to the area and wait until it dries. Then sandpaper the area and dust it again to remove any remaining particles.
If you are peeling off old paint, use a putty knife or paint-scraper to remove as much of the material as possible. Spackle around the edge of the chipping paint and then sand down the area and dust it thoroughly before applying new paint.
Removing stains will require solvents; some require nothing more than a damp sponge; you can also try dish soap in small quantity. Tougher stains will obviously require a stronger cleanser. If mildew has collected, particularly mold spores, this should be cleansed with a bleach solution to prevent it from reappearing right away.
A larger quantity of nail holes or other more significant damage may require re-plastering an entire area. Obviously, this is a much larger undertaking, not necessarily beyond your ability to do it, but it’s well worth considering if, at this time, you would be better served by engaging the services of a professional remodeler/repairman.
In any event, maintaining the upkeep and look of your walls and ceilings has more than just cosmetic value; it keeps the integrity of your home at its best, as well.
Source: http://www.handymanmatters.com/st-louis/painting/improving-walls-and-ceilings/
Wednesday, January 25 2012
To calculate how much remodel you can afford, follow these four steps: Ballpark the cost, establish a spending limit, make a wish list, and set your priorities.
What’s on your remodeling wish list? Maybe you’re longing for a spa-like master bathroom, a new eat-in kitchen, or a garage with space enough to fit your cars and your outdoor gear. Well, when it comes to home improvements, knowing what you want is the easy part. The tougher question is figuring out how much you can afford. Follow this four-step plan to arrive at the answer.
Ballpark the costs
The first step is to get a handle on how much your remodeling dreams will cost. Remodeling Magazine’s 2010-11 Cost vs. Value Report gives national averages for 35 common projects. Or you can use a per-square-foot estimate: In general, major upgrades, such as a bathroom remodel or a family-room addition, run $100 to $200 per square foot. Your local National Association of Home Builders (NAHB) affiliate can help with estimates. At this point, you’re not trying to nail down exact prices, but to get a rough sense of what your project might cost.
Figure out how much you have to spend
Once you have a ballpark cost estimate, the next question is whether you have the money. If you’re paying cash, that’s pretty easy to answer. But if you’re borrowing, you need to assess how much a bank will lend you and what that loan will add to your monthly expenses.
For the vast majority of homeowners, the best way to borrow for a home improvement is a home equity line of credit. A HELOC (pronounced HEE-lock) is a loan that’s secured by your home equity, which means that it qualifies for a lower rate than other loan types, and you can deduct the interest on your taxes. Because a HELOC is a line of credit rather than a lump-sum loan, it comes with a checkbook that you use to withdraw money as needed, up to the maximum amount of the loan. For help shopping for a HELOC, download our free worksheet.
The catch is that the minimum payment on a HELOC is just that month’s interest; you’re not required to pay back any principal. Like only paying the minimum due on a credit card, that’s a recipe for getting stuck in debt. Instead, establish your own repayment schedule. You can do this simply by paying 1/60th of the principal (for a five-year paydown) or 1/120th (for 10 years) in addition to the monthly interest. If you can’t afford that much, then you should reconsider your project.
Get quotes from contractors
Once you have ballpark estimates of what your job might cost and how much you can spend, you know whether it’s feasible to move forward. Assuming the numbers are within shooting range of each other, it’s time to get a nuts-and-bolts assessment of project costs.
Don’t ask contractors for bids yet, though. First, you need to determine exactly what you want, right down to the kitchen countertop material and the type of faucet. By specifying these details up front, you ensure that contractors are all pricing the same things, rather than the countertop and faucet they assume you want. If you’re using an architect or designer, bring them in now to help with these choices. If not, consult magazines, go to showrooms, and visit friends’ houses for ideas.
Next, get recommendations for at least three contractors from friends, neighbors, and other tradesmen that you trust. Give each one your project description and specific product lists and request an itemized bid. To make a final decision, assess some of their previous work, their attitudes, and their references, and then choose the contractor who impresses you most.
Prioritize and phase
Take the winning contractor’s bid and add a 15% to 20% contingency for the unforeseen problems and changes that occur on every project. Is the total still within your ability to pay? If so, you’re ready to get started. If not, it’s time to scale back your plans.
Because you have an itemized bid, you can get a good sense of what you’ll save by eliminating various aspects of the project. Enlist the contractor’s help: Explain that you’ve decided to hire him (and you’re not trying to nickel-and-dime him) but that the bid is over your budget, and ask him to recommend ways to cut costs. He may suggest phasing parts of the job—keeping your old appliances in your new kitchen, for example, because they’re easy to upgrade later—or stealing some underutilized square footage for part of your family room to reduce the size of the addition. He may even suggest waiting until the slow winter season, or letting you do some of the work yourself. Once the bottom line on the bid matches the bottom line on your budget, you’re ready to transform your home.
Read more: http://www.houselogic.com/home-advice/planning-your-remodel/how-to-budget-for-home-remodel/#ixzz1kU1Kha1p
Wednesday, December 21 2011
Christmas is just around the corner and for many of us that means houseguests, and houseguests mean putting the guest room to its intended use. For many of you, your guest room has become an attached storage unit full of boxes, bags and bundles of stuff.
Over time, those dinner parties, shopping sprees and the spousal complaint about the clutter on the dining room table have created one too many junk piles shoved into your guest room. Now it’s December, and ready or not, company is coming.
Begin by sorting like items into boxes. Then organize the contents of each box in the room where they belong, purging any items that you no longer need or want. Now it is time to spice up the guest room making sure it is clutter free, organized and ready for company.
If you do not already have one, consider putting a mirror in your guest room. This is especially helpful when there is not a connected bathroom, if someone is taking a shower or the bathroom mirror is already occupied. The guest room mirror allows a second person to get ready for the day. If space is limited, purchase an over-the-door mirror or hang one on the wall. Add a shelf or surface area underneath or close by so guests have a place to put makeup, a hair dryer or other accessories.
Just because it is a guest room, it does not mean you cannot use the closet space for family storage. There are options for visiting guests to hang clothes such as garment bars that mount to a wall or over a door. These pull out for temporary hanging space and when not in use push back flush against the wall.
An organized room is a comfortable and a well thought out room. If you can, spend a night in the room and think about what your guests might need during their stay. Small gestures by you can make the stay more special for them and less stressful for you. Some guests feel comfortable getting snacks from your pantry and drinks from your fridge, while others do not. Leave a tray of snacks, fresh fruit and bottled water in the guest room. Even if your guests do not eat them during their stay, encourage them to take them for the trip home.
Your guests will be impressed by how organized the space was and also by your thoughtfulness, and you will know exactly what is in your guest room. The next time the phone rings or you receive an email from a friend or relative asking to visit, your guest room will be ready.
Lorraine Brock is a professional organizer and owner of Get Organized!. Get Organized! is a professional organizing service in the Dallas, Texas area. As of Dec. 9, 2011, this service provider was highly rated on Angie’s List. Ratings are subject to change based on consumer feedback, so check AngiesList.com for the most up-to-date reviews. The views expressed by this author do not necessarily reflect those of Angie’s List.
Source: http://magazine.angieslist.com/home-organization/articles/get-your-guest-room-ready-for-holiday-guests.aspx
Thursday, December 15 2011
December is a great month to cozy things up at home. The brighter and warmer a house looks and feels, the happier you will be. That's why we are including with this letter a few tips to make your house as cheery as possible!
And don't forget, if you have any real estate questions, you can always reach Rolando at
499-9234 or Kathy at 499-0246 or visit our Web site at: www.TheTrentiniTeam.com
FIVE WAYS TO MAKE YOUR HOME BRIGHT, COZY AND CHEERFUL
Fix it up:
Candlescaping:
Mirror mirror, on the wall:
Light the way:
Open up:
During daytime hours, keep your draperies and window coverings open. This will not only allow your home to absorb heat, but it will brighten up the winter days that you spend at home.Lighting isn't just for indoor decorating it's also a valuable addition to the exterior of your home. Line your walkway or garden with cost-efficient solar light fixtures (no electricity needed!) to create a brilliant nighttime landscape outside your home. Mirrors not only create the illusion that your rooms are even more spacious than they already are, they also reflect light! Make your house warm and cozy by adding a few inexpensive mirrors in hallways, bedrooms and living spaces.Candles are generally inexpensive and are extremely versatile. Adding various candle arrangements to different rooms in your home will instantly create an atmosphere of warmth and style. Get creative! You might also favor scented candles to add a pleasant scent to different areas of the house.The light fixtures in your home are a reflection of your personal style and taste. Adding additional fixtures or replacing ones that aren't your favorites can be a fun and creative way to brighten up your home!
Friday, December 09 2011
With construction costs rising and the hassles associated with taking on a renovation project, many homeowners can be reluctant to tackle certain projects when it comes to remodeling their home. However, according to the 2011-12 Remodeling Cost vs. Value Report, several inexpensive exterior replacement projects are not only crucial to a home’s regular upkeep, but are also expected to recoup close to 70 percent of costs.
Exterior replacement projects continuously outperform other remodeling projects in terms of resale value, especially siding, window and door replacements. These types of projects are considered essential to regular home maintenance so homeowners will need to implement them anyway to keep their house functioning properly. The good news is that these projects do not require expensive materials. Many exterior replacement projects can be performed with durable low-maintenance materials and they also have the added bonus of instantly adding curb appeal, which is important to those looking to sell.
The 2011-12 Remodeling Cost vs. Value Report compares construction costs with resale values for 35 midrange and upscale remodeling projects in 80 markets across the country. Realtors® provided their insight into local markets and buyer home preferences within those markets. Overall Realtors® estimated that home owners would recoup an average of 57.7 percent of their investment in 35 different improvement projects, down from an average of 60 percent last year.
Seven of the top 10 most cost-effective projects nationally in terms of value recouped are exterior replacement projects. Upscale fiber-cement siding replacement was judged by Realtors® as the project expected to return the most money, with an estimated 78 percent of cost recouped upon resale. Two additional siding replacement projects were in the top 10, including foam-backed vinyl siding and upscale vinyl siding. In addition, three door replacements were among the top exterior replacement projects. The steel entry door replacement is the least expensive project in the report, costing little more than $1,200 on average and is expected to recoup 73 percent of cost upon resale. Both the midrange and upscale garage door replacements are expected to return more than 71 percent of costs.
There are regional differences when it comes to the resale value of particular remodeling projects. Relators® can help homeowners decide what low-cost improvement investments will provide the most upon resale in their particular market. It’s important to keep in mind that resale value is just one factor among many that homeowners must take into account when making a decision to remodel.”
Three interior remodeling projects are also considered worthy investments. A midrange attic bedroom remodel is expected to return 72.5 percent of cost. Out of all the projects it is the least expensive way to add a bedroom and bathroom within a home’s existing footprint. A minor kitchen remodel and wood deck addition are also expected to recoup more than 70 percent of costs. Improvement projects that are expected to return the least are a sunroom addition and a home office remodel, both estimated to recoup less than 46 percent of costs.
The 2011-12 Remodeling Cost vs. Value Report is published by Remodeling magazine publisher Hanley Wood, LLC and is in collaboration with the National Association of Realtors®. Additional data for the report can be found at NAR’s consumer website, HouseLogic.com. The website includes a wide variety of ideas and projects to help homeowners maintain, enhance and improve the value of their homes.
Monday, November 21 2011
Repair wood floors and scratches that make rooms look worn out. We’ll show you easy ways to put the luster back into your floors.
Dogs chase kids, pans drop, chairs scrape, and soon you must repair wood floors and erase scratches that make a mess of your red oak or Brazilian cherry. A professional floor refinisher will charge $1 to $4 per sq. ft. to apply a new coat of finish. No worries. We’ve got inexpensive ways to remove wood scratches and repair deep gouges in a few easy steps.
Camouflage scratches
Take some artistic license to hide minor scratches in wood floors by rubbing on stain-matching crayons and Sharpie pens. Wax sticks, such as Minwax Stain Markers, are great scratch busters because they include stain and urethane, which protects the floor’s finish.
Don’t be afraid to mix a couple of colors together to get a good match. And don’t sweat if the color is a little off. Real hardwoods mix several hues and tones. So long as you cover the contrasting “white” scratches, color imperfections will match perfectly.
Homemade polish
Mix equal parts olive oil and vinegar, which work together to remove dirt, moisturize, and shine wood. Pour a little directly onto the scratch. Let the polish soak in for 24 hours, then wipe off. Repeat until the scratch disappears.
Spot-sand deep scratches
It takes time to repair wood gouges: Sand, fill, sand again, stain, and seal. Here are some tips to make the job go faster.
- Sand with fine-gauge steel wool or lightweight sandpaper.
- Always sand with the grain.
- Use wood filler, which takes stain better than wood putty.
- Use a plastic putty knife to avoid more scratches.
- Seal the area with polyurethane, or whatever product was used on the floor originally.
Fix gaps in floor
Old floorboards can separate over time. Fill the gaps with colored wood putty. Or, if you have some leftover planks, rip a narrow band and glue it into the gap.
Read more: http://www.houselogic.com/home-advice/repair-tips/repair-wood-floors-and-erase-ugly-scratches/#ixzz1e5XbHSvr
Wednesday, November 16 2011
November is a great month the holidays are fast approaching, we get to visit more often with family and friends, and colder weather makes us feel like getting cozy in our homes. Since you'll want to keep warm in the coming months, we are including a list of tips for you this month that will help you to save money on your energy bill, while still staying warm and cozy!
We hope these tips help you as much as they've helped me. If you have any home or real estate questions, please feel free to call Rolando at 499-9234 or Kathy at 499-0246 at any time or visit our Web site at: www.TheTrentiniTeam.com
FIVE WAYS TO SAVE ENERGY IN THE COLDER MONTHS
· Set the timer: Program your thermostat to reach lower temperatures while you're sleeping or out of the house. This simple action can save you a lot of money and will ensure that your house stays at a comfortable temperature at all times.
· Open and shut: During daytime hours, keep your blinds, draperies and other window coverings open. This will enable your home to absorb the warm afternoon sunshine and will effectively add heat to the entire house. Close all window coverings at night to keep the heat in!
· Installation time: If you have a window or two that feels drafty no matter what you do, consider installing tight, insulating shades to those particular windows. You'll be surprised what a little bit of extra insulation can accomplish!
· Light a fire: A fireplace is an easy solution to add extra heat to your home without adding to your energy bill. Capable of warming the entire room, you and your family can relax at home while keeping the thermostat at a lower temperature.
· No leaks allowed: Check doors and windows for drafts and places where air might escape. Weatherizing windows and doors is a simple task that you can perform; your local home improvement warehouse will have all of the materials you need! improvement warehouse will have all of the materials you need!
Monday, October 31 2011
The winter months are quickly approaching, and we are hoping that you'll have a warm, cozy season in your beautiful new home! In fact, we are including with this letter some quick tips for making sure that you and your new home are ready for the winter months ahead! We hope that you find these tips to be helpful and useful. If you need anything at all, you can reach Rolando at 499-9234 or Kathy at 499-0246 or visit our Web site at: www.TheTrentiniTeam.com
FIVE QUICK TIPS TO GET YOUR HOME READY FOR WINTER
Roof repairs:
Seal it off:
Hot stuff:
Chimney sweep:
Creosote, a black substance that builds up in the chimney when wood is burned, can cause chimney fires. Inspect your chimney for creosote and call a chimney sweep to keep your fireplace safe and functional.Make sure that your heater and ventilation systems are in good working order! Clean out accessible ducts and replace filters where necessary.Inspect doors and windows to ensure that the weather-stripping is in good condition. This will keep your house warmer and cozier in the winter months.
Gutter check:
Now's the time to clean out those rain gutters again! If you want to do it yourself, make sure that you can safely access the gutters and then scoop out any debris, blast the drains clean with a high-powered hose, and repair any leaks you may find along the way.If you can safely get onto your roof to inspect for missing shingles or other factors that may lead to a leaky roof, now's the time to do it! If not, call in a professional organization and have them take care of the rooftop work for you.
Wednesday, October 26 2011
Don’t use chemicals to clear clogged drains. Use a plumber’s snake and follow these tips on preventing clogged drains.
Clogged drains are the most common home plumbing problem, but you probably don’t think much about the network of pipes inside your home’s walls until a drain stops working. Clogged drains are a hassle, but easily cleared.
However, you can avoid the hassle by paying attention to what goes down your drain. A little care prolongs the life of plumbing pipes, prevents leaks, and avoids costly repairs.
Avoid chemical drain-clearing products
You can buy chemicals to clear clogged drains, but these products sometimes do more harm than good. They can actually erode cast-iron drainpipes.
And because they typically don’t remove the entire clog, the problem is likely to recur, causing you to use the chemicals repeatedly. The caustic action of chemicals may eventually wear away the insides of pipes, causing leaks.
Better to hire a plumber to snake the drain (usually $85 to $325) and completely remove the chunk of hair or grease that’s plugging the line.
Better still (and cheaper!), pick up a manually operated augur, or snake, of your own, for about $15 at the hardware store. Or, rent an electric snake for about $30 for a half day, and try clearing the clogged drain yourself.
Prevent clogged drains
Clogged drains aren’t just nuisances. Backed-up water puts added pressure on wastepipes, stressing them and shortening their lifespan. To avoid clogged drains:
- Keep food scraps out of kitchen drains. Scrape food into the trash before doing dishes—even if you have a disposal—and never put liquid grease down the drain; pour it into a sealable container to put in the garbage after it cools.
- Keep hair out of bathroom drains. Install screens over drains in showers and tubs, and pull out what hair you can every few weeks to prevent buildups.
- Keep anything but sewage and TP out of toilets.
Keep your sewer lines or septic tank clear
If you have municipal sewers, hire a plumber to snake your main sewage cleanout every few years. This will cost $135 to $600, and will remove tree roots that inevitably work their way into these pipes—leading to messy sewage backups.
If you have a septic system, get the tank pumped out every three to five years for $75 to $350; it’ll be more for larger tanks.
A former staff writer for the Wall Street Journal, Joe Bousquin writes about housing, construction, and home improvement. The galvanized steel water pipes in his 1930 home in Sacramento, Calif., have all been replaced with copper.
Read more: http://www.houselogic.com/home-advice/electrical/how-to-prevent-drain-clogs-and-blockage/#ixzz1bowJLuFj
Thursday, September 22 2011
Labor Day through Halloween is your window for preparing lawns for a lush spring.
Although spring lawn care gets all the attention, fall lawn care is the make-it or break-it season for grass.
“I’m already thinking about next year,” says John Dillon, who takes care of New York City’s Central Park, which features 200 acres of lawn in the middle of Manhattan. “The grass I grow this fall is what will be there next spring.”
Fall lawn care is no walk in the park. It’s hard work, and Dillon guides you through the four basic steps.
1. Aeration
Aeration gives your lawn a breather in autumn and provides room for new grass to spread without competition from spring weeds. Aeration tools pull up plugs of grass and soil, breaking up compacted turf. That allows water, oxygen, and nutrients to reach roots, and gives seeds room to sprout.
If kids frequently play on your lawn, plan to aerate twice a year — fall and spring. If your lawn is just for show, then aerate once a year — and maybe even once every other year.
A hand-aerating tool ($20), which looks like a pitchfork with hollow tines, is labor-intensive and meant for unplugging small sections of grass. Gas-powered aerating machines (rental, $20/hour) are about the size of a big lawn mower, and are good for working entire lawns. Bring some muscle when you pick up your rental: Aerating machines are heavy and can be hard to lift into your truck or SUV.
Depending on the size of your property, professional aeration costs about $150.
2. Seeding
Fall, when the soil temperature is about 55 degrees, is the best time to seed your lawn because turf roots grow vigorously in fall and winter. If you want a lush lawn, don’t cheap out on the seed.
Bags of inexpensive seed ($35 for 15 pounds) often contain hollow husks, weed seed, and annual rye grass seed, which grows until the first frost then drops dead. Splurge on the good stuff ($55 for 15 pounds of Kentucky Bluegrass seed), which resists drought, disease, and insects.
Water your new seed every day for 10 to 20 days until it germinates.
3. Fertilizing
A late fall fertilization — before the first frost — helps your grass survive a harsh winter and encourages it to grow green and lush in spring. Make your last fertilization of the year count by choosing a product high (10% to 15%) in phosphorous, which is critical for root growth, Dillon says.
Note: Some states are banning phosphorous-rich fertilizers, which are harmful to the watershed. In those places, look for nitrogen-rich fertilizers, which promote shoot and root growth. Check with your local extension service to see what regulations apply in your area.
4. Mulching
Instead of raking leaves, run over them a couple of times with your mower to grind them into mulch. The shredded leaves protect grass from winter wind and desiccation. An added bonus — shredded leaves decompose into yummy organic matter to feed grass roots.
A mulching blade ($10) that attaches to your mower will grind the leaves even finer.
Lisa Kaplan Gordon is a HouseLogic managing editor and builder.
Read more: http://www.houselogic.com/articles/fall-lawn-care-tips/#ixzz1YXTFvTEt
Wednesday, September 21 2011
If you live in the Midwest, here are maintenance jobs you should complete every fall and winter to prevent costly repairs and keep your home in peak condition.
Certain home maintenance tasks should be completed each season to prevent structural damage, save energy, and keep all your home’s systems running properly. What maintenance tasks are most important for the Midwest in fall and winter? Here are the major issues you should be aware of and critical tasks you should complete. For a comprehensive list of tasks by season, refer to the to-do list to the right of this article.
Keep your Midwestern home free from damage by preparing for the constant cycle of freezing and thawing that occurs throughout fall and winter. “In fall, it’s important to do seemingly minor things that can have disastrous consequences if not done early,” says Frank Lesh, president of Home Sweet Home Inspection Co. in Indian Head Park, Ill.
Key maintenance tasks to perform
• Disconnect hoses from outside faucets. This keeps water inside the hose from freezing and splitting the casing, and it also allows the pipes inside the wall to drain completely so that water doesn’t freeze and crack them. Most outside spigots now are self-draining, but if you have an older home, you may have to manually turn off the valve inside the house to shut off the water so that it drains completely (this valve is usually in the basement or crawl space near where the pipe goes to the outside).
It’s important to remember this task, because you may not notice that these pipes have burst until you turn the faucet on in spring and water leaks into your exterior wall. If you’re lucky, Lesh says, you’ll have a major leak that will be noticeable right away; it’s actually worse to have a slower leak that allows water to drip slowly into the wall, where mold and rot can do extensive damage without your even seeing it.
• Seal coat blacktop driveways. The heat of summer may cause asphalt to expand and crack. If these cracks aren’t repaired, water gets into them and freezes, widening the cracks. Eventually, big chunks of asphalt will break off and repair will become more difficult and expensive, so applying sealant (generally every two to three years) is an important preventive step.
On a warm, dry day in early fall when you don’t expect rain for at least 24 hours, you should clear the driveway of debris, clean up any oil stains with detergent and a scrub brush (be sure to rinse the entire driveway well with a hose), and apply asphalt crack filler to individual cracks larger than 1/4 inch wide. Allow the filler to dry for at least an hour and then spread a coat of sealant over the entire driveway. Don’t use the driveway for at least 24 hours. Expect to pay $100 for the driveway detergent, crack filler, long-handled roller, and sealer needed to do the job.
If you have a concrete driveway, you don’t need to maintain it—unless it’s less than a year old. It’s very important that during the first year of curing, no salt come into contact with the surface; don’t salt your driveway and clear any roadway salt that gets thrown onto it.
• Clean your gutters. In the Midwest, this task is especially crucial because of freezing and thawing. “After a snowfall it’s typical for the sun to come out just long enough to melt the snow on your roof, which then drips into the gutters,” Lesh says. “But the water freezes before it’s all drained.” If your gutters are clogged with debris, standing water freezes and forces its way up under the roof shingles or into the eaves, which introduces moisture that can eventually rot the roof decking. Trapped ice and frozen debris can also bend your gutters so that they don’t drain well, or even pull them away from the house.
• Schedule your annual furnace checkup. Your technician should be able to tell you exactly what he’s going to check to keep your furnace maintained. Lesh recommends asking open-ended questions (“What specifically will you be cleaning?”) and making sure the contractor is checking fuel connections, burner combustion, and the heat exchanger. In the meantime, you should be checking your furnace filters monthly and changing them whenever they’re dirty. Inspect floor grates and return ducts regularly and clean them out with a vacuum cleaner brush. You may want to enroll in a yearly maintenance agreement with an HVAC professional that includes a fall furnace service and a spring air conditioning service. Otherwise, expect to pay $50 to $100 for a furnace tune-up.
You don’t need to prepare your outside air conditioning unit for cold weather because it’s designed to withstand snow and cold. In fact, if you cover your unit with plastic to protect it, you provide a place for mice to overwinter and gnaw through the unit’s wiring. If your unit sits in a spot that’s vulnerable to falling ice or heavy tree limbs, place a sheet of plywood over the top and cover with a loose drop cloth for protection; just don’t enclose the space completely.
• Make sure deck and porch boards are secure. Loose or warped boards are hazardous. Prop up low spots with wooden shims and fasten loose boards with galvanized deck screws
• Insulate your whole-house fan. If you use a whole-house fan to help cool your house, be sure to cover it when not in use with an insulated box or other cover. “If you don’t, heated air—which you’ve paid for—will enter the attic,” Lesh says. Introducing warm, moist air into the attic will then cause frost to form on the cold surface of the roof decking, which melts and drips onto the attic floor—your ceiling, in other words. Mold and staining can result.
You can make a simple fan cover from a batt of insulation; make sure it fits snugly over the opening with no gaps. For about $30, you can buy duct tape and a piece of 2-inch-thick polystyrene foam and make a foam box to fit over the top; 2-inch foam has an insulating value of about R-10.
Attic fans, designed to remove super-hot air from attics, are usually installed in the roof or gable ends of an attic space. Unlike whole-house fans, attic fans don’t require insulation, but fall is a good time to investigate whether animals have tried to force their way in through the screen covering the vent. Replace the screen if necessary.
• Scrape, prime, and paint. Lesh recommends painting wood surfaces early in the fall before the weather gets too cold and before winter’s moisture has a chance to do any damage. Scrape peeling paint even if you can’t get to the painting this season—water actually sheds better off bare wood than wood with peeling paint attached, which traps moisture.
• Prune back trees. After leaves drop, prune any nearby trees or bushes, especially if snowfall will cause them to bend and rub against the house. This can shorten the lifespan of your roof and siding.
Performing these important fall maintenance tasks can prevent costly repairs and alert you to developing problems.
Karin Beuerlein has covered home improvement and green living topics extensively for HGTV.com, FineLiving.com, and FrontDoor.com. In more than a decade of freelancing, she’s also written for dozens of national and regional publications, including Better Homes & Gardens, The History Channel Magazine, Eating Well, and Chicago Tribune. She and her husband started married life by remodeling the house they were living in. They still have both the marriage and the house, no small feat.
Read more: http://www.houselogic.com/articles/fall-winter-seasonal-maintenance-guide-midwest/#ixzz1YXSNjNPY
Wednesday, September 14 2011
Unless you do your laundry in the buff, it’s one chore that’s never really done. Follow these laundry room storage ideas, however, and you can breeze through your dirty duds in no time.
Locate your washer and dryer as close to bedrooms as possible, and then make supplies a snap to find with these laundry room storage ideas.
1. Make space for your washer and dryer
Put your laundry room or area near bedrooms where you generate the most laundry so you can minimize steps and clothes clutter. To carve out space for a laundry station inside a bathroom or hall closet, you’ll need:
- Electric outlets. Electric dryers require a 220-volt dedicated outlet. Cost: $300 to $1,000, professionally installed.
- Plumbing. The washer needs hot and cold water connections as well as a drain or a hose fed into a standpipe. All dryers require a vent to the outside to exhaust heat from the drum. Gas dryers require a gas line. Cost: $300 to $550.
- Space requirements. For a stackable washer and dryer, provide a minimum space of 40 inches deep and 32 inches wide. A side-by-side washer and dryer need space measuring at least 40 inches deep and 56 inches wide.
2. Add cabinets for better laundry room storage
De-clutter by keeping laundry room necessities out of sight.
- Drawer units. Front load washers and dryers are easy on your back when elevated with base pedestals, which offer drawer storage. Pedestals usually are made by individual manufacturers to fit their brand. Cost: $110 to $265.
- Stock cabinetry. Home centers offer stock kitchen cabinetry that you can install above and/or beside the washer and dryer. For a laundry near the kitchen, select cabinetry that complements existing units. Cost: $130 to $350 per cabinet.
- Freestanding laundry room storage. To keep clutter out of sight behind doors, position a freestanding cabinet between or beside the washer and dryer. Some armoires feature hanging space inside.
- Extras. Equip a stock or freestanding cabinet with a fold-down ironing board and a holder for the iron and related supplies.
3. Provide laundry room storage bins, baskets, and more
- Bins. Canvas or solid metal bins keep small items corralled and out of sight inside a cabinet or on open shelves. Wire baskets make it easy to inventory supplies while keeping similar items together.
- Lined baskets. A canvas lining provides visual appeal and prevents wicker from snagging folded linens or other items you store inside.
- Pull-outs. Rather than bending and rooting around in the back of a base cabinet, equip it with a pullout hamper, wastebasket, or shelves.
- Sorters and hampers. You’ll find a variety of bins for storing and sorting soiled laundry, including canvas versions with an overhead rod for hanging clothes.
4. Include easy-access surfaces
- Open shelves. Melamine or wire shelves above or beside the washer and dryer provide a good spot for quickly accessing often-used supplies.
- Countertops. A countertop on base cabinets or installed above a front-load washer and dryer (that aren’t elevated on pedestals) provide a place for folding clothes.
5. Create space for hanging clothes
Include a spot to hang clothing fresh from the dryer or to drip dry. For example, stretch a pole between tall cabinets flanking the washer and dryer. For compact laundry room storage spaces, look for collapsible hanging units or retractable clotheslines.
Jan Soults Walker, a nationally published home improvement writer for more than 25 years, would rather hunt for flea market finds than the laundry soap.
Read more: http://www.houselogic.com/articles/laundry-room-storage-5-naked-truths/#ixzz1XNxmYl5Y
Friday, September 09 2011
Back when I lived in a high-rise condominium, I had a simple television and a decent sound system – nothing special. After I got married, my wife and I moved to a single-family home and wanted to take the opportunity to create a truly remarkable media room in our basement.
We ended up spending plenty of money renovating our seventy-year-old house, so we had very little left over for a state-of-the-art movie room. Despite the tight budget, we built an incredible entertainment center.
There are plenty of companies ready and waiting to build your dream room, and they charge you tens of thousands of dollars to do it. However, if you want to save by taking on the project yourself, consider these five key elements of creating your media room, and the ways to exceed expectations without exceeding your budget.
Acoustics
Have you ever noticed how high-end audio stores always demonstrate their speakers in a special room? It’s no trade secret; the acoustics of your room have about as much to do with your perceived sound quality as the speakers themselves.
When you keep acoustics in mind for your room design, you can help contain sounds and minimize the penetration of outside noises by building a space that absorbs sound rather than reflecting or transmitting it. The key to incredible sound is how you cover the space, top to bottom.
Ceiling
Acoustic tiles are the ideal surface for your room’s ceiling. Visit any movie theater, and you will notice that their ceilings are covered with fiberglass panels much like the ones in the dropped ceilings you see in most offices. Fortunately, using these drop systems is the least expensive way to cover an unfinished ceiling.
Because of the low ceilings in my basement, I had to remove the existing ceiling first. Within the structure of the floor above, I added two layers of common fiberglass insulation. Two layers of insulation won’t retain much more heat than one, but packing in a second layer really helps to contain the sound. Though insulation is messy, it’s inexpensive and easy to install.
Next, I installed all of the hardware and wiring for the lights, speakers, and ceiling mounted projector.
Finally, I installed the drop ceiling made of standard fiberglass tiles. Most media rooms are black, to create a theater-like experience, and the hardest part was finding all of the tiles and hardware in black. I finally found a home improvement store that would special order it for me. If you are unable to find black panels, you can coat them with spray paint before installing them.
I completed the ceiling first so as to minimize the chances of damaging the walls or ruining the carpet. The total cost of our 150-square-foot-room was under $200.
Wall Surface
Most modern homes have walls made of drywall, while older homes like mine have plaster walls. Both materials have terrible acoustics.
To fix the problem, I added inexpensive, lightweight acoustic boards that almost any home improvement store will carry. I then had my carpet installer cover them with thin, indoor/outdoor carpeting, like the kind you’d find covering the walls of many movie theaters.
Again, you will want to complete the walls before you start on the floor in order to avoid ruining your floor’s carpet. My total cost was under $500 for the acoustic panels, the thin carpet, and the installation.
Window Coverings
If you have windows in your movie room, try to cover them to block out light. Room-darkening shades are a great option, especially combined with standard curtains. Alternatively, you can purchase heavier curtains that are lined to keep out light.
Read More Here: http://www.moneycrashers.com/home-movie-theater-design-installation/
Monday, August 22 2011
Low-cost kitchen storage strategies bring calm to your kitchen, banishing stress-inducing clutter and leaving the space calm and orderly.
Good news for budget-minded cleaning compulsives: Getting organized in the kitchen won’t drain your piggy bank. Stash more cash and control the chaos with these low-cost kitchen storage solutions, all readily available at home centers, discount stores, and online.
Rack attack: Store pots, everyday dishes, spices, and wine on racks that are freestanding, wall-hung, and ceiling-hung—and voila! Everything is in its own location, visible, and easily accessible!
Position the racks where they make sense: A pot rack above the cooktop; a dish rack close to the dishwasher for quick unloading; spices near the range or meal prep area; a wine rack near the wine glasses and dining table.
You’ll find racks in metal, wood, and other materials, starting as low as $10 to $15.
Shelf expression: You can size an open shelf to fit anywhere you need it and paint or stain it to match your décor. Use shelves for storing such kitchen necessities as cookbooks, attractive dishware, oils and vinegars, and spices.
Home improvement centers have storage sections where you can hunt, but don’t overlook the office supply and bathroom sections for even more low-cost shelves.
You’ll find cool shelves starting as low as $8.
Great divide: Organize the contents of kitchen drawers and cabinets with wire or wood inserts. Drawer dividers keep utensils sorted and orderly. Vertical dividers inside cabinets create a spot for storing trays and cookie sheets. You’ll also find special inserts for storing knives and spices neatly inside drawers.
Available in wire, wood, or plastic, dividers start at about $3.
Elevated thinking: Wire stacking shelves have legs to elevate the storage surface. Set a stacking shelf on a countertop, existing shelf, or inside a cabinet to increase kitchen storage space. Use a stacking shelf for canned goods, dishware, spices, and more.
Prices start at about $6.
Hang ups: Install pegs or hooks along a backsplash, inside cabinets, or anywhere on a kitchen wall to create a place for cups, hot pads, cooking utensils, keys, and recipe clips. Hooks are available that fit over doors or come equipped with magnets that adhere to any metal surface.
Pegs and hooks start as low as $1.
Basket case: Baskets come in a variety of materials to complement your décor, from natural woven grasses to canvas to colorful plastic bins. Set baskets on open shelves, inside cupboards, and on the kitchen counter to round up small items, such as napkin rings and bamboo skewers.
Baskets are great for storing dish towels, cloth napkins, and coupons. Prices start as low as $1.
With four home renovations to her credit, Jan Soults Walker is a devotee of improvements, products, and trends for the home and garden. For 25 years she’s written for a number of national home shelter publications, and has authored 18 books on home improvement and decorating.
Read more: http://www.houselogic.com/articles/low-cost-kitchen-storage-cheap-stress-reduction/#ixzz1VIJCE6hE
Monday, August 15 2011
Today’s cost-conscious home owner is focused on two things: reducing costs and protecting the value of their home. You can do both with these five home improvement projects that cost less than $25 and can save you thousands in future repairs, according to HouseMaster, a home inspection franchise.
1. Be aware of termite or carpenter ant damage. Home owners who diligently check their property and foundation can alleviate serious termite or carpenter ant problems. Before selling or purchasing a home, look closely for any signs such as “mud tubes” or wood damage. Also, moving wood piles and debris away from the home can eliminate termite or carpenter ant problems.
2. When it rains, it pours. One of the most common places for water damage is in a bathroom. When grout breaks down, water can easily get behind the tiles and cause them to come loose. An easy solution to this is to re-grout, caulk, and use sealant on bathroom tile and surrounding fixtures. In other cases, where water penetration is affecting the foundation of a house, a splash box is a cost-efficient solution to direct water away from the foundation.
3. Clean the gutters. Stained siding under a gutter indicates overflowing, which can cause structural damage. In addition, overgrown vegetation on gutters can cause clogging or potential termite issues. Trimming vegetation away from the house and cleaning gutters offers many advantages and minimizes the risk for potential costly repairs in the future.
4. Replace rusting roof flashings. Flashings deteriorate over time and can allow water penetration, resulting in expensive damage to the underlying roof structure. For under $25, replace roof flashings or apply sealant to the problem area.
5. Seal your deck. If not properly maintained decks are very susceptible to the effects of weather exposure. Once wood becomes rotted, it’s more likely to be infested by termites, carpenter ants, etc. Purchase deck sealant at an inexpensive price to seal your deck and prevent future damage.
Read more: http://www.houselogic.com/news/articles/5-home-improvement-projects-under-25/#ixzz1UjSSYpVS
Friday, August 12 2011
One of the best things about owning your own home particularly in the summertime is the opportunity to enjoy your privacy and to entertain guests. Want to make the most of these luxuries? We have compiled a list of fun summer activities that we thought you might enjoy.
By the way, if you need any additional advice pertaining to real estate or to your home, please don't hesitate to call Rolando at 499-9234 or Kathy at 499-0246 or visit our Web site at: www.TheTrentiniTeam.com
FIVE FUN SUMMER ACTIVITIES FOR HOMEOWNERS
· Barbecue: Nothing says summertime as much as an old-fashioned barbecue! Do you have friends or family who still haven't had the chance to see your beautiful new home? Invite them over for an afternoon of sun, fun and a tour of the house.
· Campout fun: Another longstanding tradition is the summer campout but this doesn't mean you have to drive hundreds of miles to find a great location. Your backyard is a great camping spot! Dig the flashlights, tents and camping gear out of the garage and thrill the kids with a backyard campout!
· Cool and clean: It might not sound like fun, but having a neighborhood car wash is a great way to keep cool and make friends with the people who share your street. Rally the neighbors and make a day of it the kids will have fun squirting each other with the hoses, and you'll have a shiny, clean car!
· Who dunnit: Throw a mystery dinner party, and invite your guests for an evening of fun and intrigue (and show off that dining room!). Kits can be purchased at most toy stores (or via the Internet) for a reasonable price, and you'll have a wonderful evening that will be memorable for everyone!
Grab a mallet: While you may have once thought that croquet was a sport for fuddy-duddies, it is rapidly growing in popularity. Show off your perfectly manicured lawn by inviting a few friends over for an afternoon croquet party. If you're feeling really adventurous, try some horseshoes as well!
Thursday, August 11 2011
There is nothing that I like better than to find an additional use for a common household item. This can cut down on having to buy additional cleaners and/or chemicals for my household, which is always good. And of course, invariably these additional uses will save you money. Once I got into living frugally, I really began to research these “extra” uses. Some of them are quite ingenious! I’ve come up with a short list of multiple uses for five common items you likely have around your house. The list is by no means inclusive, so feel free to add your ideas in the comments section. I know that some of you house moms and dads have some great ideas out there!
Dryer Sheets
The best part I like about these additional uses is that for a lot of them the dryer sheet doesn’t even have to be new. So with these ideas, you are really getting something for free while also recycling your products. Dryer sheets can be used to get pet hair off of furniture and clothing, and, if you put a little fabric softener on one, you can then remove dust from a TV screen or computer monitor and keep it from coming back.
Some additional uses…
- Remove burnt food from casserole dishes (soak in warm water with the sheet)
- Get rid of and prevent odors just about anywhere you can think of (even in your shoes!)
- Remove soap build up from your shower
- Place in your clothes drawer or suitcase while vacationing for that “just washed” smell all the time
- Clean paint brushes (soak in warm water with the sheet)
Aluminum Foil
Would you like to cook the perfect pie crust? Wrap the edges in aluminum foil. Line your grill with it and pokes holes in it to prevent chicken/meats from cooking too fast. Scissors need sharpening? Cut through a few pieces of foil, and presto—sharp scissors.
A few more…
- To reuse a paint brush for the same job without having to clean it, wrap it in foil, place in fridge
- Wrap doorknobs with it while painting
- Line paint tray with it rather than buying the premade plastic inserts
- Polishing silverware. What a time saver! Line a pan with foil, fill with cold water. Add a little salt, put silver in for three minutes. Rinse and dry.
WD40
This list could be a mile long. Far too many uses to get into all of them. But keep in mind that the manufacturer does not recommend a lot of the uses for how people use it. I’ve included only some of those that have the blessing of the makers of WD40. In addition to it lubricating almost everything, it will also:
- Loosen zippers
- Clean roof racks on vehicles
- Remove bug “guts” on your car’s grill
- Removes remnants of duct tape
- Keeps rust away from most tools
- Keeps pigeons away (they dislike the smell)
- Removes black scuffmarks from kitchen floors
White Vinegar
One of my new found favorites. You can substitute a little white vinegar for just about any household cleaning job. White vinegar can be used to clean the hoses in your washing machine, the insides of your coffee maker, the inside of your steam iron, and a variety of other things. Freeze some with some water and grind through your garbage disposal to get rid of odors there too! Some others you may not have known about are…
- Remove chewing gum
- Help pain from sunburn
- Soothe a sore throat
- Itching
- Ear infections
- Athlete’s Foot
- Remedy for acne
- Body odor
- Cure for hiccups
This list could go on forever…
Toothpaste
Toothpaste can clean, it can deodorize, and it can make you more beautiful! A short list of some unintended uses for toothpaste:
- Remove pimples
- Polish nails (nails are similar in their makeup to teeth)
- Car freshener (wrap some in paper towels and put under your seat)
- Clean walls, jewelry, shoes, and even piano keys
- Hang posters on the wall (no lie)
- Sub for spackle (will fill nail holes on walls)
So there you go. A whole host of new uses for items I am pretty sure you have lying around the house. A few of these I already knew about, a lot of them I didn’t. I can’t even imagine the savings if you employ half of these ideas.
Care to elaborate on any of these lists?
Source: http://www.moneycrashers.com/little-known-uses-for-five-common-household-items/
Wednesday, August 03 2011
In a recent post we addressed the issue of controlling moisture inside the home. But how do you protect your home from heavy rains and snow? Realtor® Tom Slupske of Maple Grove, Minnesota gives five ways to control moisture outside the home before it can get in and cause damage:
These days, homes are at a greater risk of water damage than ever before. Heavier precipitation and less predictable weather patterns increase the chance of unwanted water entering our homes.
Water damage is serious business. It is a drain – financially, emotionally, even physically. Just one inch is all it takes to destroy sentimental or irreplaceable items, or to create structural damage that can depreciate the value of your home. The bacteria and mold it can leave in its wake can affect air quality in your home and create potential health risks. The best way to deal with water damage is to prevent it from happening in the first place.
Here are some easy things you can do outside your home to help keep you safe and dry.
Disconnect downspouts from the municipal sewer system.Extend downspouts at least 6 feet away from your basement walls and drain away from your house towards the street or backyard.
Install a rain barrel to minimize the amount of surface water that could enter your home.
Grade the earth or hard surfaces around your home to slope away from your foundation.
Before temperatures drop to freezing, turn off the water supply to outdoor taps and faucets, then open the taps to drain the water completely. Leave taps in the open position until spring.
Keep gutters and downspouts clear of leaves and other debris – clean them out at least once a year – late fall is a good time.
With a little know-how and some routine maintenance, you can stay ahead of the wave and keep unwanted water out.
Read more: Controlling Moisture Outside The Home | REALTOR.com® Blogs
Tuesday, June 14 2011
Are you ready for summer in your new home? We all know that summer brings to mind relaxation, vacation and rest but we also know that it can get hot! We thought you might like to have a few tips on keeping cool in the upcoming summer, so that you can enjoy life to the fullest in your beautiful new house.
We will be happy to answer any questions you may have!
COOL-DOWN TRICKS FOR THE HOT SUMMER MONTHS
Spin it: Ceiling fans are an excellent way to keep everyone cool, and they're beautiful as well. But did you know that they can also help you to save on your energy bill? By circulating cool air throughout your home, you won't need to keep the thermostat set as low as you would without the help of one, two or more well-placed fans.
Green is good: There's no debating how refreshing a large patch of shade can be on a hot summer day& so why not invest in some shade of your own? Planting trees is an excellent way to ensure shade and to keep your house cool in the warmer months. Already have some? Make the most of the summer foliage by relaxing beneath a large tree and sipping some cool lemonade.
Clear as a bell: Window manufacturing and supply companies now offer an invisible way to keep you cool: by installing a transparent coating to windows that effectively blocks heat. Adding this type of treatment to your sunniest windows is a smart and easy way to save a few dollars on your energy bill.
Program and relax: If you have a programmable thermostat but haven't gotten around to figuring out how to use it, now's the time. Setting your thermostat to regulate the temperature of your house and maintaining an average temperature can save you a lot of money. Can't find the instructions? Most manufacturers provide free, downloadable guides via the Internet.
Block it out: Room-darkening blinds can reflect a great deal of sun and heat, so keep them closed during the morning and afternoon hours to keep things cool inside!
Friday, May 13 2011
Spring is here, and it's time to truly make your landscape shine! After all, one of the joys in owning your own home is attending to and personalizing your own yard! Since the focal point of most landscaping is the lawn (also one of the trickiest things to maintain), we are including a special list of tips and tricks to help you whip your lawn into perfect shape. Giving special attention to the lawn now will help to keep it healthy throughout the summer; we hope you find this list to be as helpful as we have!
Please remember that if you have any need for household advice or tips or would like to discuss any real estate questions Rolando is always available at 499-9234 or Kathy at 499-0246 or visit our Web site at: www.TheTrentiniTeam.com
FIVE WAYS TO ACHIEVE A GORGEOUS LAWN
· Water = Green: Water is one ingredient that your lawn cannot live without, so make sure that you've got a great routine in place for keeping the lawn damp. If you have a good sprinkler system installed, you're already a step ahead of the game! If not, make sure that you're reaching all areas of the lawn if watering by hand or by moveable sprinkler. Water in the evening or very early morning for best results, but don't overdo it!
· Know how to mow: Make sure your lawn mower has sharp blades; mowing with dull blades can tear the grass, altering its healthy appearance. Also, the more often you mow, the healthier your grass will be! Mow the lawn at least once per week for optimal results.
· Fertilize and vitalize: Invest in a good fertilizer and use it regularly for the thickest, greenest grass. Ever wonder why the fairways and greens on a golf course manage to look beautiful throughout the year? Fertilizer is the key to the greens keeper's success. For the greenest grass possible, purchase a fertilizer with iron content.
· Weed it out: Weeds are an obvious eyesore when it comes to the care of your lawn, and you've probably noticed how quickly they can grow. With a good fertilizer program in place, you'll get a step ahead of weeds in no time. For the pesky, hardier plants, manage the growth with a little weed spray (or dig them out by hand for best results).
· Don't get bugged: Lawn pests are not just annoying: they are bad for the grass. If you're properly watering, fertilizing and mowing your lawn, but still have an insect or pest problem, try aerating the lawn; this should help to eliminate the little buggers!
We are pleased to let you know that we have started a new blog site TheTrentiniBlog. We will continue to bring you articles pertaining to Evansville and real estate. We hope you will bookmark this page and we hope you enjoy reading our articles. We are certainly open to discussions how we can improve our site. Please send us a short note, this would make our day.
Thank you, Rolando & Kathy Trentini
Friday, April 01 2011
The do-it-yourself home improvement market has faced a 21 percent drop from 2005-2010, according to the latest research from market researcher Mintel. Yet, that’s not due to lack of will on home owner's part, but more about lack of money, according to the survey.
More than a quarter of DIYers surveyed said they would undertake a major home renovation or addition to their home if they had the funds.
Nearly 40 percent of DIYers say that making a major home improvement is the best long-term investment they can make.
However, with the sagging housing market, many home owners have opted to put off major renovation projects, but forecasters are already seeing signs that is changing.
“We forecast growth to accelerate in 2011 and, presuming a stabilization of the housing market, to remain positive through 2015,” says Bill Patterson, senior analyst at Mintel. “Pent-up demand, ongoing need for repair and maintenance, retro-fitting, and renovations from boomers approaching retirement and demand from millennials should all propel DIY spending.”
Source: http://www.realtor.org/RMODaily.nsf/pages/News2011040106?OpenDocument
Monday, March 14 2011
After what’s felt like an eternity pretending not to see it, you’ve reached the point where you can no longer ignore that ugly wallpaper the previous owners put up. Yes, indeed, this wall covering must come down. Now.
The problem: How do you remove the wallpaper without damaging the wall — or yourself? There are several options, including steaming or spraying with chemicals, but you'll have to decide which one will work best for you and your wallpaper.
How do you remove the wallpaper without damaging the wall — or yourself? Use these tips to help you decide which option will work best.
"People usually have no clue on how to strip wallpaper," says Gerald Bishop, owner of Wallcoverings and the Fresno Wallpaper Design Warehouse in Fresno, Calif. "It's not that difficult. But it takes a lot of patience, and there's an art to stripping wallpaper."
Which method you use to take down the wallpaper will often depend on the product. Some wallpapers can be stripped dry, while others will need a removal solution. And then, any damage to the wall will depend on how the wallpaper was installed.
"Every job is different," Gerald says. "It all stems from what the contractor did before." For example, if the wall wasn't sealed with a primer before the wallpaper was put up, removing the wallpaper can cause some damage to the wall's texture or the drywall.
Using a steamer to remove wallpaper isn't as popular as it once was. "We used to use them 25 years ago, and they were (heated with) propane," says Larry Meacham of Larry's Painting and Decorating in Fresno.
These days, steamers are electric, he says. "They may work for some people, but I don't use them."
Gerald doesn't use steamers either. "It works, but you end up scalding your hands. It also takes twice as long to strip the wallpaper."
Instead, Larry and Gerald like to use a concentrated remover solution that is mixed with water. The solution dissolves the adhesive wallpaper backing, making it easy to take off. Before starting, gather the right tools and do some basic preparations. Tools you'll need include: one or two 3-to-6-inch broad knives, a ladder, a scoring tool and a garden sprayer, such as a 2-gallon plastic pump.
You'll need a plastic sheet or a drop cloth to cover the carpet or floor. Take down outlet covers, then mix the solution and hot water together. Larry and Gerald like to use DIF by Zinsser, which is available at home-improvement stores.
Next, test a small area of the wall, about a 3' x 3' section, by lifting an edge of the wallpaper. "You have to determine what the grain is," Gerald says. "It can be stripped left to right, up and down, or more."
If the wallpaper doesn't come off easily, spray the remover-solution mixture on the area and let it soak into the wallpaper. You may need to apply it several times.
Next, try stripping the wallpaper by hand. The backing will be left, which you can scrape off with a broad knife.
If the mixture isn't penetrating through the wallpaper, use the scoring tool in circular motions to make tiny punctures into the material. This will allow the mixture to saturate the wallpaper and its backing quicker.
Gerald cautions, however, to use the tool as a last resort. "You have to do it with the right pressure and not gouge the drywall," he says.
As you take off the wallpaper, you may find more underneath. "No matter what the manufacturers tell you, you can only take down one at a time" without risking damage to the wall, says John Franke, an interior design expert with the Comfort Council, an advisory board of design and lifestyle experts.
Once the wallpaper and its backing are removed, spray the wall with the mixture one last time and scrape off any missed spots. Then, wipe down the wall with a moist sponge and let it dry for a few days.
Source: http://www.hgtv.com/decorating/how-to-remove-wallpaper-patience-is-a-virtue/index.html
Friday, March 11 2011
A good exterior paint job isn’t cheap, but done right, it can easily last 10 or more years. To get the most for your money, follow these steps.
At first glance, the days of wood home exteriors seem long gone. According to U.S. Census Bureau data, homes with wood siding comprise less than 10% of all new residential construction, the lowest usage of any exterior material.
But if you’ve got wood siding, there’s a solid, money-in-the-bank reason why you’d want to repaint rather than switch to fiber-cement, brick, or vinyl. In the short term, repainting or staining costs less. A midrange vinyl siding replacement project will cost you around $10,000, according to Remodeling Magazine’s Cost vs. Value report. By comparison, hiring a pro to repaint the same 2,000-square-foot, two-story house costs $4,000 to $6,000.
True, if you’re planning to stay in your house for a long time, you’ll have to spend that money again. But properly applied, exterior paint can easily last 10 years or longer. The key to a successful job is in the preparation. Here are the steps to take to make sure you get perfect results.
Step 1: Check for lead paint
Beginning April 22, 2010, all paint contractors must observe EPA regulations for lead-safe practices and be certified to perform this work. The rule applies to houses built before 1978, when lead paint was banned for residential use, especially those that are occupied by children. (Do-it-yourselfers are exempt.)
To protect against airborne lead particles, contractors must take steps to keep paint dust to a minimum: collecting scrapings, cleaning with a HEPA vacuum, wearing masks and Tyvek suits, and disposing of all materials at an approved hazardous materials site.
The first step is to initiate the process with a lead paint test (homeowner kits are available for $10 to $15 online or at paint and hardware stores). Following the new rules will add as much as 10% to 20% to the cost of a contracted paint job. But since many contractors are still unaware of the regulation, costs will vary widely.
Step 2: Wash the exterior
Pigment won’t adhere well if you don’t wash grime off the house first. A good cleaning agent is water mixed with a phosphate-free cleanser such as Jomax House Cleaner or Green Clean by Sherwin-Williams, which won’t harm plantings. “You want to clean off everything: dust, dirt, and mildew,” says Paul Dixon of Bionic Man Painting, in Asheville, N.C. “A lot of people don’t, and then wonder why the paint comes off.”
Mildew, in particular, thrives under fresh paint. A good wash will kill spores so they don’t proliferate. You can hand-apply the solution with a sponge, but that requires a lot of up-and-down on a ladder. Most contractors simply apply solution with a pressure washer.
Step 3: Scrape off loose paint
Once clapboards are dry, remove loose, flaking paint. A handheld scraper is usually the best tool for the job, though you can also use a hot-air gun or infrared paint stripper. Never use an open-flame torch. They can easily cause a fire and are illegal in most states unless you have a permit. To work lead-safe, you must wear a mask and Tyvek suit, spray water on the paint as you scrape, and collect the debris.
Step 4: Sand rough spots
A pad sander or random-orbit sander fitted with 50- to 80-grit sandpaper will smooth out any remaining rough spots, but take care not to push so hard that you leave sander marks in the wood. As with the previous step, sanding lead-safe means working masked, wetting as you go, and using sanders fitted with HEPA filters.
Step 5: Fill and repair
Inspect what you’ve uncovered and make some decisions. Minor holes or dings in the siding can be easily filled in with a patching putty or compound such as Zinsser’s Ready Patch ($20 per gallon). If you’ve got a major rot problem, summon a carpenter to replace the bad wood.
Step 6: Apply a coat of primer
Apply primer as soon as possible after the previous step. White, gray, or tinted primer provides an even base for topcoats to adhere to, and a uniform canvas from which to survey your work. “Once you get the primer on, now you can see what’s really going on,” says Mario Guertin, a contractor with Painting in Partnership, in Palatine, Ill.
Small gaps in joints and around doors, windows, and other spots where horizontals meet verticals will all stand out in high relief, showing you where you need to fill in with caulk.
If you’re painting over bare wood or existing latex paint, then latex primer is fine. But if you’re painting over multiple coats of oil-based paint, it’s best to stick with a new coat of oil-based primer.
Step 7: Caulk all joints
Siliconized or top-of-the line polyurethane acrylic caulks give paint jobs a smooth, pleasing look. But the benefits aren’t purely aesthetic. Tight joints also prevent air leaks and block water penetration. It’s worth springing for $7-a-tube polyurethane caulks with 55-year warranties, which will stand up to weather better than 35-year caulks costing less than $3. The average house requires about 7 tubes of caulk; contractors buy them in 12-pack cases and use them for several jobs.
Step 8: Choose the right paint
No-brainer here. Painting with water-based acrylic latex is so much easier than dealing with oil-based paints. But choose finishes carefully. As a rule, the higher the sheen, the better the paint is at blocking the sun’s damaging rays. Satin is fine for shingles or clapboards, but you’ll want gloss paint to protect high-traffic parts of a house, such as window casings, porches, and doorframes. A gallon of premium exterior latex costs $35 to $45.
Step 9: Apply top coat(s)
There is such a thing as too much paint. The more layers, the more likely the paint is to flake off years later. Tread lightly. If you’re going from a white house to yellow or cream, you might be able to get by with one coat. Going from a light to a dark house, and vice versa, usually requires two coats.
Step 10: Practice good maintenance
You can extend the life of a good paint job by inspecting the caulk every year, replacing any that’s cracked or missing, and doing minimal touch-up-all easy jobs for homeowners to do themselves.
Joseph D’Agnese is a journalist and book author who has written numerous articles on home improvement. He lives in North Carolina.
Read more: http://www.houselogic.com/articles/10-steps-perfect-exterior-paint-job/#ixzz1G7HzDbwu
Wednesday, March 09 2011
Spring is upon us, and it's time to dust off the old mop and get ready to do some deep cleaning.
Don't worry spring cleaning can be a fun and rewarding experience, if you approach it with the right mindset! See for yourself with this letter, we are including a list of tips to help you get the most out of your spring cleaning experience. We hope you find these special tips useful. Remember to call us with any real estate questions you may have, and remember to tell your friends about us! You can reach Rolando at 812-499-9234 or Kathy at 812-499-0246 or visit our Web site at: www.TheTrentiniTeam.com
FIVE FUN AND EASY SPRING CLEANING TIPS
· Dance while you dust: This is the perfect time to fully indulge your musical interests; break out the iPod or turn up the CD player, and you'll be singing along to your favorite tunes and won't find cleaning to be a chore at all!
· Clear out the clutter: Take the opportunity to dig into the closets, storage spaces and, of course the garage. You've probably got a veritable treasure trove of old clutter that's just taking up space now's the time for a yard sale! Turn that clutter into cash.
· Room by room: Try to focus on just one room at a time, and try to complete one room each day. This will make the whole job seem more manageable, and you'll probably get things cleaned more thoroughly than if you tried to tackle the whole house at once!
· Just a little more laundry: One of the things that we rarely attend to is the state of our draperies, shower curtains and rugs. Now is your chance: gather up every spare bit of linen in the house and have it laundered; you'll be surprised by how much brighter your home will look!
· A room with a view: It's time to tackle those windows! Set aside a special day to give your windows a good scrubbing. Clean off any screens while you're at it: your home will literally sparkle once you're finished.
Friday, March 04 2011
Pests are not just unwanted houseguests--they're also a threat to your home investment. In many cases, pests bring down a home's price more than high crime rates or low quality schools. In this sense, they pose a greater risk than fire and flood. Termite damage costs U.S. homeowners more than $5 billion annually.
The 's ChallengeExterminator
The best time to call an exterminator is right away, before the symptoms of an infestation appear. Early detection of termites or other pests can help you protect your investment and avoid thousands of dollars in treatment and structural repair costs. Termites and carpenter ants work from the inside out, gradually consuming the wood until the structure fails altogether. Unlike rats or raccoons, these destructive pests are "silent invaders"--they may hide undetected for years, leaving no marks on the wood's exterior surface.
Exterminators Detect the Early Signs of Termites
Professional exterminators possess a trained eye to spot the early signs of a termite or carpenter ant infestation. Telltale evidence of termites or ant colonies includes:
- Mudholes or "mud tubes" along the exterior walls of your home. About the size of a pencil, these are tunnels that provide termites a direct thoroughfare from the soil outside into your home's wall.
- Piles of sawdust along windowsills or on the ground next to walls.
- Cracks, small holes, or paint bubbles on the wall's surface.
- Wood that sounds hollow when tapped with a hammer.
- Swarms of winged insects in and around the home.
These signs indicate that an infestation is underway. An expert can assess the extent of the problem and recommend solutions. Exterminators are trained in pest identification and control. They understand how pests such as termites behave, and how best to clear the premises of these destructive visitors.
A standing relationship with a pest exterminator can help you protect your property from pest invasion. "Every successful pest control program begins with a partnership between the homeowners and the professionals," explains Ron Harrison, Ph.D., technical director for a leading pest control company. Routine inspections (at least once a year) by an experienced exterminator can catch the worst offenders--termites and carpenter ants--before they eat into your walls and your property value.
Thursday, March 03 2011
You have installed vinyl or aluminum siding on your house, and you look forward to a long vacation from the cares of maintaining wood siding. You are done scraping and repainting every four or five years, and you are delighted. Sadly, no house siding product for your home can be 100% maintenance free. With a little bit of care though, your house siding will retain its good looks for years to come. Cleaning Your Vinyl Siding or Aluminum Siding
Over time dirt, grime, and even mildew can build up your house siding. You can clean off these deposits using a pressure washer, which can be rented from most hardware stores. The key is to use a lower-pressure nozzle to avoid damaging the siding. A cleaning solution made with diluted liquid detergent works well on especially dirty siding, but if your siding is only lightly soiled, water alone should do the trick. You should always spray the siding using a downward angle to avoid shooting water up between the spaces in the siding. If you are not a do-it-yourselfer, you can find a pressure washing professional to do the job for you.
Aluminum and Vinyl Siding Repairs
At some point, your house siding might require some repairs. Aluminum siding can get dented when objects such as stray basketballs hit it. Vinyl siding is susceptible to cracking in the winter because the cold temperatures make it more brittle. Also, vinyl siding can melt if you lean something very hot against it, such as a barbecue grill lid. If a panel of your house siding is damaged, it easily can be removed and replaced with a new piece that has been cut to size and locked into place. In general, it is much easier to repair vinyl and aluminum siding than wood siding.
Though you will not escape maintenance duties entirely with vinyl or aluminum siding, they offer a worry-free and attractive exterior finish for your home.
Source: http://www.guidetohomeimprovement.com/siding/servicearticle/cleaning-your-vinyl-siding-or-aluminum-siding.jsp
Wednesday, March 02 2011
The phrase “home energy efficiency” causes most of us to immediately think about triple-paned windows and Energy Star appliances. Important energy savers, to be sure. However, as one energy efficiency expert counsels, not all changes have to be big or expensive to make a difference. Many of the small choices we make every day can impact our energy usage as well.
Daniel Lanzilotta, owner of The Mindful Chef and an executive chef/chef educator, offers these simple tips to ensure your kitchen is energy efficient.
Refrigerator tips:
- Check your seal. One of the most important factors in determining your refrigerator’s energy efficiency is the quality of its seal. Check the seal regularly to ensure it is not dried out and is still sealing properly. If it’s not, replace it. This inexpensive repair can make a big difference in your refrigerator’s efficiency.
- Stop refrigerator gazing. We’re all guilty of standing mindlessly in front of the open refrigerator door, pondering what we should eat. Not only can this habit lead to poor choices, it also increases our utility bill as well. According to Lanzilotta, this represents one of the basic laws of thermo-dynamics—heat is attracted to cold—and gazing at an open refrigerator causes the hot air to rush in, raising the internal temperature of the appliance.
- Allow food to cool. When you place hot leftovers directly into your refrigerator, you are forcing your appliance to work harder than necessary to cool your food and, in turn, the interior of the unit. By allowing your food to begin to cool naturally before placing it in the fridge, you’re increasing your efficiency and saving money and energy.
Sink and dishwasher tips:
- Be mindful of water waste. By being aware and conservative when using water at the sink you can dramatically reduce your water waste. Run water only when necessary and only use hot water when absolutely needed.
- Wait until your dishwasher is full. Many people are guilty of running a dishwasher half-empty. Lanzilotta urges people to wait until the unit is full before running. Also, check your settings to make sure you are only utilizing the features that are necessary.
- Take care of your hot water heater. Perhaps the most important kitchen-efficiency change you can make is not even found in the kitchen. Check your hot water heater’s setting and insulate pipes to prevent heat loss.
Read more: http://www.houselogic.com/news/articles/simple-kitchen-tips-can-mean-big-changes-energy-efficiency/#ixzz1FNZnvxc7
Sunday, February 27 2011
Adding motion sensor lighting in and around your house provides an automated, hands-free way to turn on lights when you need them, and off when you don’t.
Motion sensor lights are eager helpers and good little guardians. They illuminate the way to your front door when you pull into your driveway, light hallways when you get up in the middle of the night, and turn on lamps when you enter a room.
They also provide safety and home security, powering up exterior floodlights should someone attempt to trespass when it’s dark outside.
In addition, they watch over your budget, dutifully turning themselves off after you’ve entered your home or left a room—saving you money on energy bills. Light-sensing diodes prevent them from switching on during daylight hours.
Plug-and-play lighting solutions
Many motion sensor lights don’t require elaborate setups or wiring; they simply plug into any wall outlet. Battery-operated types can be mounted onto your walls using adhesives, magnets, or screws.
Sylvania’s LED Motion Sensor Light runs off batteries, is easy to install in any room, and is especially handy for small spaces, such as closets. Cost: $13.
Put a sensor on anything
Have a lamp in your living room you want to turn on automatically when you walk in? The SensorPlug Motion Sensor Outlet Plug from Andev plugs into any standard wall outlet. In addition to lamps, you can use it with equipment that doesn’t exceed 500 watts, such as fans and radios.
The SensorPlug Motion Sensor Outlet Plug costs between $10 and $20.
Sun power
If your home gets ample sunlight during the day, install a solar-powered light and avoid the need to do any wiring. Designed for the outdoors, the Solar Security with Motion Detector from Concept helps you save money by not tapping into your home’s electricity.
It uses 32 long-lasting LED lamps, providing bright illumination for places like your driveway and front door. Since only sunlight is needed to recharge the battery, you can attach it anywhere on your property, such as the far end of your yard.
The Concept Solar Security with Motion Detector is available through Amazon at $49. The Solar-Powered 80 LED Security Floodlight, an even brighter light with 80 LED lamps, costs $105 from Smart Home Systems.
Overhead detection
You can easily add a motion sensor to an existing overhead light fixture by adding adaptive devices, such as the Motion Sensing Light Socket from First Alert.
Simply screw the motion-sensing light socket into an existing wall or ceiling fixture and add a 25- to 100-watt light bulb. Some motion-dection light sockets won’t support energy-saving compact fluorescent bulbs, but for rooms that are infrequently used, such as an unfinished basement, it’s a quick solution. The First Alert Motion Sensing Light Socket sells for $25.
Home automation sensors
Home automation systems, such as those based on X10 and Z-Wave technology, are great for controlling your thermostat and home entertainment center, but they also are useful for home security purposes. Linked to motion sensor lights, your home automation system can send a signal to have lights turned on when triggered by a timer or by your smartphone.
The HomeSeer HSM100 sensor is available for Z-Wave systems for $74, and the Eagle Eye Indoor/Outdoor Motion Sensor costs between $18 and $30.
A writer covering the latest technologies and trends for a variety of national publications, Les Shu is currently automating his home with the newest doodads to make it smarter than he is.
Read more: http://www.houselogic.com/articles/motion-sensor-lighting-safety-and-security-indoors-and-out/#ixzz1EzdTW896
Thursday, February 17 2011
TRIMMING COSTS STARTS AT HOME
Many Americans have resolved to cut costs in 2011. One of the best places to start is in your home. There are several low-cost ways to create significant savings on your utility bills throughout the lifetime of your home.
Check for leaks.
Cold air seeping in through your doors and windows and weak spots in your insulation can have a huge impact on your energy costs. Test for these issues by taking infrared images, conducting a blower door test, or simply locating cool air by touch. You can save 10 percent on your energy bill by plugging air leaks with caulking, sealing or weather stripping.
Upgrade your attic insulation.
This simple, inexpensive solution can reduce your home's heating and cooling costs by as much as 30 percent. The recommended insulation level is 12-15 inches, depending on the insulation type.
Take a close look at your windows.
Windows can also account for 10-25 percent of your heating bill in the winter and can kick your air conditioner into overdrive in the summer by letting sunlight in. Consider installing energy-efficient windows to help block solar heat. If that’s not in your budget, simply modifying your window treatments with thicker or longer curtains can also help lower bills too.
Upgrade your appliances.
Swapping out all appliances isn’t realistic for most homeowners, but if you’re in the market for a new washer, dryer or fridge, consider an Energy Star product.
Check your filters.
Dirty filters slow down airflow, making your system work harder to keep your home warm or cool. Clean filters also prevent dust and dirt buildup – an issue that can lead to expensive repairs or system replacement. Filters should be replaced every three months.
Swap old light bulbs for new, energy-efficient ones.
Energy-efficient light bulbs require much less power to provide the same amount of light for a much longer time.
Make small adjustments
to your routine.
-Turn off lights and electronics when
they’re not in use.
-Do laundry and wash dishes in the
evenings instead of midday, when
usage is typically greatest.
-Wash clothes and dishes in hot water,
but rinse them in warm rather than
hot to save heating costs.
-Don't run the dishwasher until it's full
or consider washing dishes by
hand occasionally.
-Don’t use too many appliances at
the same time.
Picking up on small changes can make a huge impact on electric and energy usage. For more on what you can do to save on home costs, follow Energy Star’s Maintenance Checklist.
When searching for a home service agreement, check to see if plumbing stoppages are included. Sometimes they are not covered at all and other times you may have to pay extra. With a HomeTrust home service agreement, plumbing stoppages are covered under the standard coverage.
www.2-10.com
Tuesday, February 15 2011
February is a great time to accomplish simple tasks that will add to the value and appearance of your home. We hope that you are enjoying the unique experience of being a homeowner! We have done a little research and have compiled a list of quick, easy projects that you might enjoy!
If you need additional tips or advice, please feel free to call us anytime at 812-499-9234 for Rolando and 812-499-0246 for Kathy. We would be happy to hear from you and would love to offer any guidance that we can!
FIVE QUICK AND EASY HOME IMPROVEMENT PROJECTS
Go green:
A few changes to the landscaping of your home can make a world of difference! You might want to consider planting some fruit trees in the backyard, adding a touch of color with some bright and unusual flowers or perhaps finally starting the vegetable garden you've always dreamed about.
Add a touch of color:
Feeling creative? Why not give the family room, bedroom or bathroom a whole new look? By focusing on the improvement of one room at a time, you'll find that what can seem like an overwhelming job becomes fun and simple. Repainting a single room can be inexpensively completed over a single weekend.
Bright and beautiful:
Replacing the light fixtures in your house with personally selected pieces can drastically increase your home's beauty and value. Choose a cohesive look for the entire house, or decorate room by room! The installation of new fixtures is generally a quick do-it-yourself task.
Tile it up:
While it might seem like a daunting task, installing new tile in a kitchen or bathroom can be easily accomplished with a little know-how and the right supplies. Your local home improvement warehouse will have everything you need to revamp and personalize the flooring of your choice!
The beauty beneath:
Always dreamed of having beautiful hardwood floors? Choose a room, pull up the carpet, and you'll be on your way to accomplishing just that! Repairing, refinishing and staining the floor is a simple step-by-step process that you can achieve without the heavy expense of installing new wood panels.
While it might seem like a daunting task, installing new tile in a kitchen or bathroom can be easily accomplished with a little know-how and the right supplies. Your local home improvement warehouse will have everything you need to revamp and personalize the flooring of your choice!Replacing the light fixtures in your house with personally selected pieces can drastically increase your home's beauty and value. Choose a cohesive look for the entire house, or decorate room by room! The installation of new fixtures is generally a quick do-it-yourself task. Feeling creative? Why not give the family room, bedroom or bathroom a whole new look? By focusing on the improvement of one room at a time, you'll find that what can seem like an overwhelming job becomes fun and simple. Repainting a single room can be inexpensively completed over a single weekend.
A few changes to the landscaping of your home can make a world of difference! You might want to consider planting some fruit trees in the backyard, adding a touch of color with some bright and unusual flowers or perhaps finally starting the vegetable garden you've always dreamed about.
Thursday, January 06 2011
FIVE TIPS FOR DO-IT-YOURSELF WORK AROUND THE HOME
· Make a list: Spend some time taking stock of the kinds of maintenance and improvement projects you'd like to begin. A well-considered list will help you to set reachable goals.
· Assess your skills: Make sure that you carefully consider which projects you are fully capable of completing. For example, unless you have sufficient experience with electrical, plumbing or construction work, you should probably leave those tasks to the professionals.
· Establish priorities: Which projects are most important to you? Which projects will be the most costly? Which is more important: timeliness, quality or cost? Before beginning any do-it-yourself project, it is always wise to determine specific goals and priorities so that you are fully prepared when it comes time to begin.
· Create a budget: For each project that you want to complete, make certain that you have a firm budget in place. Allowing for unexpected circumstances (such as errors or the need for additional materials) in your budget will keep you from overspending.
· One step at a time: When it's time to begin, remember to pace yourself! Rome wasn't built in a day, and your new garden terrace will take time as well. Complete one task at a time, and soon you'll feel the wonderful sense of satisfaction and accomplishment that doing-it-yourself can bring!
Monday, November 22 2010
With the summer lawn watering season over, winterizing your lawn irrigation system now can save a lot of money later by preventing leaks. A leak in an underground sprinkler line can be difficult to detect and can waste as much as 9,100 gallons of water per year, the Alliance for Water Efficiency says.
Typically, preparing an irrigation system for the winter months starts with removing all the water from the system by shutting off the water supply to the system and then using compressed air to blow out the remaining water from the associated pipes and sprinkler heads. Removing water from the system helps prevent damage to the underground pipes due to the freezing and thawing that takes place during the winter months, says Missouri American Water, which provides water to 1.5 million people in Missouri.
Irrigation contractors can winterize the backflow prevention assembly that is required for all irrigation systems by the Missouri Department of Natural Resources, Missouri American said. Backflow assemblies on lawn irrigation systems help to protect the water system from the risk of contamination in the event of an unexpected loss of pressure in the system; for example, a drop in pressure caused by a water main break.
“These simple steps to winterize your irrigation system can help prevent water leaks and protect the quality of water in your home or business and in our water system,” said Missouri American Water Environmental Manager Tim Ganz.
Source: Missouri American Water
Read more: http://www.houselogic.com/news/articles/winterizing-lawn-irrigation-systems-now-prevents-costly-leaks-later/#ixzz161Y6KckT
Thursday, November 18 2010
Houses that will sit empty through the winter need attention to avoid frozen pipes, reports Long Island American Water, which is part of American Water, the largest investor-owned U.S. water and waste water utility company.
The company offers these tips for ensuring that pipes don’t burst:
· Search for pipes that are not insulated, or that pass through unheated spaces such as crawl spaces, basements, or garages. Wrap them with pre-molded foam rubber sleeves or fiberglass insulation.
· Wrap really vulnerable pipes with electric heating tape with a built-in thermostat that only turns heat on when needed.
· Seal cracks and holes in outside walls and foundations with caulking to keep cold wind from pipes. Look for areas where cable TV or phone lines enter the house, to be sure holes are tightly sealed.
· If hot-water radiators heat the home, bleed the valves by opening them slightly. Close them when water appears.
· Before really cold weather sets in, make certain that the water to outdoor hose bibs is shut off inside the house and the lines are drained.
· Drain any hoses and air conditioner pipes.
· Wrap the water heater or turn it off.
· Make sure gutters and downspouts have been cleaned to remove debris that could freeze and cause clogs during cold weather.
· Know where the main water shut-off valve is located in case it needs to be shut off during an emergency.
Source: Long Island American Water (11/16/2010) http://www.realtor.org/RMODaily.nsf/pages/News2010111706?OpenDocument
Thursday, October 21 2010
A new bathroom brings added convenience for your family and can prove to be a valuable asset should you decide to sell your home.
Depending on the size of your family and the number of existing bathrooms in your house, adding a new bathroom may be one of the best home improvement decisions you’ll make. According to Greg Miedema, chairman of the National Association of Home Builders Remodelers (NAHBR), additional bathrooms are highly desirable features. “You can almost never go wrong adding a bathroom,” says Miedema.
This is especially true if an additional bathroom helps relieve congestion at hectic times, or if it provides much-needed convenience for guests—no small considerations.
As an investment, however, a new bathroom should be carefully considered. The cost of a new bathroom ranges from $39,000 to $75,800, but the return on that investment averages a modest 59%, according to Remodeling Magazine’s annual Cost vs. Value Report. That value has been steadily declining over the past several years due to rising construction costs and falling home prices.
Nevertheless, national averages may not be a reliable predictor of value in your particular neighborhood. Before committing to a bathroom addition, call in a real estate agent or professional appraiser to evaluate whether an additional bathroom makes sense in your situation. Buyers tend to prefer houses where the number of bathrooms equals the number of bedrooms, according to the National Association of Home Builders (NAHB).
NAHB data also suggests that an additional half bath may increases a home’s value by about 10%, while an additional full bath increases the value by 20%. That means spending $1,000 to $2,000 more to add a shower or tub could double the return on your investment.
National and regional data from the Cost vs. Value Report:
National average cost, midrange 6x8-ft. bathroom addition:
Job cost: $39,000
Resale value: $23,200
Cost recoup: 59.5%
National average cost, upscale 10x10-ft. bathroom addition:
Job cost: $75,800
Resale value: $43,900
Cost recoup: 57.9%
Read more: http://www.houselogic.com/articles/bathroom-addition-return-investment/#ixzz12wVxMCfh
Monday, September 20 2010
Keep your refrigerator running efficiently and reliably with this simple maintenance routine.
“Refrigerators cool faster and work more efficiently when the condenser coils can breathe,” explains Doug Rogers, president of the Mr. Appliance repair chain. Dirty and congested coils lead not only to higher energy bills, but also a shortened appliance lifespan.
Here’s a list of maintenance tips to make sure your refrigerator stays cool and calm:
- Every three months, vacuum the fan and condenser coils on the rear or bottom of the appliance using the brush attachment. Families with shedding pets should clean the coils monthly.
- Every three months, clean the door gasket with warm soapy water and towel dry. Inspect the seal for snugness all the way around. Replace when loose, cracked, or torn.
- Every six months, replace the unit’s water filter (when present) to ensure clean water and ice, and to prevent clogs and leaks.
- Always keep food covered to prevent odors from migrating throughout the fridge and freezer. An open box of baking soda ($1) will absorb odor-causing acids for up to three months.
- Always maintain an adequate amount of clearance on all sides of the appliance except for those that are zero-clearance or front-vented.
- Every month, empty out the icemaker bucket and start fresh, as old cubes can absorb odors.
- Every three months, verify that the appliance is level both front to back and side to side to ensure both proper door movement and ice maker operation.
Douglas Trattner has covered household appliances and home improvement for HGTV.com, DIYNetworks, and the Cleveland Plain Dealer. During the 10-year stewardship of his 1925 Colonial, he’s upgraded almost every household appliance. After lengthy deliberation, he recently replaced an aging top-load washing machine with an energy-efficient front-load unit.
Read more: http://www.houselogic.com/articles/appliance-maintenance-refrigerators/#ixzz0zni9D7mX
Saturday, September 18 2010
Clogged drains are a common problem that nearly every homeowner will encounter and have to resolve. Because the plumbing pipes are designed only to bring in clean water and eliminate wastewater, poorly maintained plumbing systems can result in clogged drains. There are various substances that can create clogs. These items are not supposed to be put in the drains. In order to prevent clogs, it is important to know what kinds of items make drains clogged in home plumbing systems.
1. The bathtub drains can become clogged with a variety of substances such as hair, soap, and chemical cleaning agents which can accumulate in the drain and build up in the pipes. To prevent build up of debris and matter causing clogs, you can insert strainers in the drain hole and keep them cleaned out. As well, after bathing or showering, make sure that you run the tap water thoroughly in order to make sure all matter has been pushed through the pipes.
2. Kitchen drains can become clogged due to food, grease, and debris being put in the drain. Pour grease into a can and put it with the trash instead of pouring it down the sink. Make sure you have cleaned off all dishes that held food before you rinse and wash them. Once a week, run hot water down the sink drain to keep the pipes clear of debris. You can also add a homemade drain cleaner consisting of vinegar and baking soda down the sink once a week and flush it with hot water to remove accumulation of matter. As well, never use the garbage disposer without running water down the pipes to flush out the food particles and organic debris. Don’t put tough, fibrous foods into the garbage disposal such as chicken bones and celery pieces.
3. Some people will dump harmful products such as hot wax, paint thinner, and motor oil down the sink drain. This will not only contribute to clogs, but it can damage the plumbing system. Never pour these items into your sink drain and use non corrosive drain cleaners.
Slow drains are extremely frustrating, but a clogged drain is even more annoying. If you have something in your drain causing a clog, overtime it will only get worse and cause a more serious problem. By properly maintaining your plumbing system, you can reduce the chances of getting a clogged drain. Annual inspections by a professional plumber will help your plumbing systems stay clear, clean, and working properly.
If you do get a clog, there are items you can use to clear the clog such as sink augers, plungers, plumbing snake, and non corrosive chemical drain cleaners. There are also bacteria-based enzyme cleaners that eat away at a clog without causing damage to the pipes. Remember, for clogs that cannot be removed even after you have tried everything, it is important to contact a plumber who will have the skills and tools to identify the cause of the clog and repair the problem.
Friday, August 27 2010
I found a great site for smoke detectors and other essential safety products for the deaf and hard of hearing. We take many things for granted and sometimes forget that there are friends and family members amongst us who have disabilities and need special help.
Smoke, Fire, and CO Detectors for the Deaf and Hard of Hearing
Smoke detectors save lives. We know you take your safety and the safety of your loved ones and friends very seriously. That's why we've taken the time to hand select a collection of smoke detectors and carbon monoxide detectors. From the popular Gentex smoke detector to the Kidde smoke alarm and beyond, make Products for the Deaf your first choice when safety matters. We're proud to offer products like the Gentex smoke alarm that features an alert alarm with strobe light. You can buy with confidence knowing that your smoke detector or carbon monoxide detector is time tested and hard working.
Saturday, August 07 2010
If you want a yard that demands less time, money, and water, consider ground cover rather than a traditional lawn.
Americans have long had a soft spot for lawns. Turf grass covers nearly 47 million acres in the U.S., according to the Lawn Institute. But there’s plenty that’s not green about all that green. For starters, the average household dumps 60 gallons of water a day on conventional lawns. Toxic lawn herbicides and pesticides run off into lakes and streams. Gas-powered mowers spew pollution into the air. And then there’s all that time spent watering, weeding, seeding, sodding, thatching, and mulching.
If you’re looking for an alternative, consider replacing some or all of your high-maintenance turf with ground covers that form walkable “carpets,” and innovative grasses that require little or no water or mowing once established.
In turn, you’ll reduce the need for irrigation, stop washing harmful chemicals into the watershed, add depth and texture to your landscape, and spend your spare time enjoying your yard instead of manicuring it.
Creeping perennials, clover, and other ground covers
There’s a ground cover to meet most needs, whether you’re planting a pathway, a hedge, or a broad swath of green. They run the gamut of foliage textures and colors, and many have wonderful flowers. Some varieties are ground-hugging and feel delicious under bare feet. Others grow up to two feet tall, making them ideal as barriers or landscape punctuation.
Look for attributes that meet your needs: child-durable, deer-resistant, drought-tolerant, shade-loving. Mixing them up is not only aesthetically pleasing, it’s also good for the landscape: Diversity increases resistance to pests and disease and reduces the need for fertilizer and pesticides. Here are some popular choices.
Creeping perennials: Tight to the ground, these plants are especially good for cushy green carpets. They keep out weeds and allow air, water, and nutrients to get to plant roots. Many work equally well in rock gardens or in crevices between stepping stones, in full or partial sun. These include mat-forming New Zealand Brass Buttons (Cotula squalida) and Scotch or Irish Moss (Sagina subulata), which isn’t a moss at all but a perennial that forms a cushiony blooming carpet.
Some, like Blue Star Creeper (Laurentia fluviatilis), which has tiny green foliage, bear up to heavy foot traffic. Creeping Jenny (Convolvulus arvensis) has an extensive root system that makes it quick to spread and tough to kill. That’s a good thing if you’re looking for a tough turf alternative but a problem if it creeps into beds where you don’t want it.
Besides being good creepers, many ground-hugging perennial herbs are often nicely scented, hardy under foot traffic, and even edible. These include chamomile (Chamaemelum nobile), which has fern-like foliage and white flowers with yellow centers; Corsican mint (Mentha requienii), which thrives in shade, exudes a minty smell when trod upon, and is edible; and various thymes (Woolly, Red, Prostrate), which feature dainty flowers and work well between pavers or as a low mounding carpet.
Creeping perennials cost $6 to $10 per plant. A 15-by-20-foot area with plants 2 inches apart (for instant density) requires 300 plants. But if you’re patient enough to wait a year or so for them to spread, you can buy fewer plants and space them 12 inches apart.
Clover: Although clover has gotten a bad rap as a weed, it’s actually not a weed at all. In fact, a clover lawn (or, for high-traffic areas, a clover-grass mix) has many advantages. Sweet-scented, inexpensive, and quite durable, white clover (Trifolium repens) grows in any kind of soil, stays green even during low-water periods, and feels lovely underfoot.
Low-growing clover doesn’t need regular cutting, nor does it need fertilizer, but an occasional mow will encourage new growth and discourage bees. If you don’t mind the bees, consider letting your clover bloom, which benefits the bees and the environment. Clover is one of the least expensive groundcover options, costing about $4 to seed 4,000 square feet.
Laura Fisher Kaiser writes about architecture, design, and sustainability. She is in the process of letting clover, moss, and creeping jenny take over what’s left of her Washington, DC, lawn.
Source: http://www.houselogic.com/articles/low-maintenance-lawn-alternatives-ground-cover/#ixzz0vvpgDUhM
Monday, July 26 2010
Appraisers and real estate agents offer advice for curb appeal that preserves value and attracts potential buyers.
Curb appeal has always been important for homesellers. With the vast majority of today’s homebuyers starting their search on the Internet, the appearance of your property is more critical than ever. You only have a few seconds to catch their attention as they scroll through listings online to get them to stop and take a closer look.
But the role of curb appeal goes beyond just making a good first impression. The way your house looks from the street can impact its value. It can also shorten the time it takes to sell your house.
We asked real estate agents, appraisers, home stagers, landscape designers, and home inspectors which curb appeal projects offer the most value when your house is on the market, both in terms of its marketability and dollars. Here is what they told us:
1. Paint the house.
Hands down, the most commonly offered curb appeal advice from our real estate pros and appraisers is to give the exterior of your home a good paint job. Buyers will instantly notice it and appraisers will note it on the valuation.
“Paint is probably the number one thing inside and out,” says Frank Lucco, managing partner of Houston-based IRR-Residential Appraisers and Consultants. “I’d give additional value for that. If you’re under two years remaining life (on the paint job), paint the exterior because it tends to show wear badly.”
Just make sure you stay within the range of accepted colors for your market. A house that’s painted a wildly different color from its competition will be marked down in value by appraisers.
2. Have the house washed.
Before you make the investment in a paint job, though, take a good look at the house. If it’s got mildew or general grunge, just washing the house could make a world of difference, says Valerie Torelli, a California real estate agent with a background in accounting.
Before she puts a house on the market, Torelli often does exterior makeovers on her clients’ homes, a service she pays for herself to get higher selling prices. Overall, she says her goal is to spend less than $5,000, with a goal of generating an extra $10,000 to $15,000 on the sale price.
Torelli specifies pressure-washing—a job that should be left to professionals. Pressure washing makes the house look “bright and clean in addition to getting rid of unsightly things like cobwebs, which may not be seen from the yard but will detract from the home’s cleanliness when seen up close,” she says.
The cost to have a professional cleaning should be a few hundred dollars—a fraction of the cost of having the house painted.
3. Trim the shrubs and green up the yard.
California real estate agent Valerie Torelli says she puts a lot of emphasis on landscaping, such as cutting down overgrown bushes and replacing them with leafy plants and annuals mulched with beautiful reddish-brown bark. “It runs me $30 to $50,” says Torelli. “Do you get a return on your money? Absolutely. It sucks people in.”
You also don’t want bare spots. Take the time to fertilize the yard, throw out some grass seed, and if need be, add some sod.
4. Add a splash of color.
It could be a flower bed of annuals by the mailbox, a paint job for the front door, or a brightly colored bench or an Adirondack chair. “You can get a cute little bench at Home Depot for $99,“ Torelli notes. “Spray paint it bright red or blue and set it in the yard or on the front porch.”
It’s not a bad idea, but don’t plan on getting extra points from an appraiser for a red bench, says John Bredemeyer, president of Realcorp in Omaha. “It’s difficult to quantify, but it does make a home sell more quickly,” Bredemeyer says. “Maybe yours sold a couple weeks faster than the house down the street. That’s the best way to look at these things.”
5. Add a fancy mailbox and house numbers.
An upscale mail box and architectural house numbers or an address plaque can give your house a distinctive look that stands out from everyone else on the block. Torelli makes them a part of her exterior makeovers “I’ve gotten those hand-painted mailboxes,” she says. “A nice one runs you $40 to $50.” Architectural house numbers may run as high as a few hundred dollars.
6. Repair or clean the roof.
Springfield, Va.-based home inspector and former builder Reggie Marston says the roof is one of the first things he looks at in assessing the condition of a home. He’ll look at other houses in the neighborhood to see if there are a lot of replaced roofs and see if the subject house has one as well. If not, he’ll look for curls in the shingles or missing shingles. “I’m looking at the roof for end-of-life expectancy,” he says.
You can pay for roof repairs now, or pay for them later in a lower appraisal; appraisers will mark down the value by the cost of the repair. That could knock thousands of dollars off your appraisal. According to Remodeling Magazine’s 2009-2010 Cost vs. Value Report, the average cost of a new asphalt shingle roof is more than $19,000.
“Roofs are issues,” Lucco says. “You won’t throw money away on that job. You gotta have a decent roof.”
Stains and plant matter, such as moss, can be handled with cleaning. It’s a job that can often be done in a day for a few hundred dollars, and makes the roof look like new. It’s not a DIY project; call a professional with the right tools to clean it without damaging it.
7. Put up a fence.
A picket fence with a garden gate to frame the yard is an asset. A fence has more impact in a family-oriented neighborhood than an upscale retirement community, Bredemeyer says, but in most instances, appraisers will give extra value for one, as long as it’s in good condition. “Day in a day out, a fence is a plus,“ Bredemeyer says. Expect to pay $2,000 to $3,500 for a professionally installed gated picket fence 3 feet high and 100 feet long.
8. Perform routine maintenance and cleaning.
Nothing sets off subconscious alarms like hanging gutters, missing bricks from the front steps, or lawn tools rusting in the bushes. It makes even the professionals question what else hasn’t been taken care of.
“A house is worth less if the maintenance isn’t done,” Lucco says. “Those little things can add up and be a very big detractor. When people say, ‘I’d buy it if it weren’t for all the deferred maintenance,’ what they’re really saying is, ‘I’d still buy it if you reduce the price.’”
Georgia-based freelance writer Pat Curry has covered housing and real estate for consumer and trade publications for more than a decade, including covering new home sales and marketing for BUILDER, the magazine of the National Association of Home Builders.
Source: http://www.houselogic.com/articles/8-tips-adding-curb-appeal-and-value-your-home/
Monday, July 12 2010
Adding tile accents to your bathroom can turn a ho-hum space into a work of art! These tips on tile can help you design a bathroom that is sure to wow your guests.
Tile Design: Let the Beauty Begin!
Tile is a very versatile way to design a bathroom that is uniquely yours. These ideas can spark the creativity necessary for that beautiful bathroom tile design:
- Choose tile that mimics the soothing feeling of water. Light blue tiles, glass tiles, and tiles that cascade down in a variety of blue and cream colors can create a visual that reminds you of water. Tile the shower walls for a more dramatic feeling.
- Use vivid tile as an accent to liven up a rather neutral bath. Splashes of lively color can be a focal point in a sizable bathroom, or make a small bathroom seem larger.
- Want your bathroom to be a real show stopper? Consider mirrored tile throughout. Not only does it make the space seem larger, it adds a brilliance that can't be matched with any other option.
- Go earthy with rough tile in natural tones. Greens, browns, and deep reds can help bring the outside in, especially if you have large windows that offer a great deal of light.
- Why stick with one color or style? Mix and match bathroom tile colors and textures to add an interesting element to your bathroom. Contrasting colors can add an elegant depth that gets your guests talking.
- Geometric shapes and patterns work well for a contemporary or minimalist bathroom style. When you use small tiles of varying colors, the options are virtually endless.
- Make a splash with large granite and slate tiles in your shower. The natural textures and colors can make your shower feel more like a waterfall than a man-made structure.
- Want to make your shower even more interesting? Opt for shower tiles on the floor that look and feel like wide, flat rocks.
- Prove your eco-friendly savvy by opting for tiles made of recycled materials. Plastic bottles are often used to create tiles and the like; make sure the tiles you choose are as close to 100 percent recycled as you can get.
- Reach for heights of elegance in your bathroom with a decorative tile mosaic. Choose a design that suits your personal style and hire a professional to create your very personal work of art.
Both functional and decorative, tiles in the bathroom can turn a simple room into a beautiful oasis.
About the author: Shannon Dauphin is a freelance writer based near Nashville, Tennessee. Her house was built in 1901, so home repair and renovation have become her hobbies.
Source: http://ideas.reliableremodeler.com/Article.aspx?Title=10-Ways-Tile-Can-Turn-Your-Bathroom-Into-a-Masterpiece&AC=1&ID=2892
Friday, July 02 2010
Outdoor kitchens continue to be one of the hottest trends in home décor, but not all of them are created equal.
Here are some things to consider when evaluating the safety and durability of this attractive yet vulnerable feature:
• Is there adequate ventilation? Extensive outdoor cooking spaces should be carefully designed to keep smoke and odors away from dining spaces.
• Was the installation done by licensed and insured installers? If something does goes wrong — even years later — these professionals will stand behind their work.
• Are the cabinets, countertops, and appliances really weather proof and likely to hold up?
Source: The Plain Dealer (Cleveland, Ohio), Roxanne Washington (07/01/2010)
http://www.realtor.org/rmodaily.nsf/pages/News2010070202?OpenDocument
Thursday, May 20 2010
If you live in the Midwest, here are maintenance jobs you should complete in spring and summer to prevent costly repairs and keep your home in top condition.
Certain home maintenance tasks should be completed each season to prevent structural damage, save energy, and keep all your home’s systems running properly. What maintenance tasks are most important for the Midwest in spring and summer? Here are the major issues you should be aware of and critical tasks you should complete. For a comprehensive list of tasks by season, refer to the to-do lists at the end of this article.
When spring arrives in the Midwest, it’s time to clean up your home and yard from the ravages of winter. As the weather warms, you can also accomplish some routine maintenance tasks that are much more agreeable when the sun is shining.
Key maintenance tasks to perform
• Check your gutters and downspouts. “Stuff accumulates even after your fall gutter cleaning,” says Frank Lesh, president of Home Sweet Home Inspection Co. in Indian Head Park, Ill. “Pine needles especially, which fall all year long and are difficult to remove.” Children’s toys, he says, also find their way into gutters between cleanings, as well as nails and other debris from the roof. Look for any signs of wind or ice damage—has the gutter pulled away from the house, or bent so that there are depressions where water can stand? You can usually repair damage yourself for under $50 by adjusting or reattaching brackets and gently hammering out bent areas.
Lesh also recommends examining your downspouts for blockages. “You can’t see inside them,” he says, “so tap them with a screwdriver handle to see if they sound hollow.” If the ends run underground, where animals can build nests or winter debris can become trapped, your best bet is to put a garden hose in the gutter and see where the water discharges. If you have a blockage, you’ll have to disassemble or dig up part of the downspout until you locate it.
• Inspect your roof for winter damage. This is best done from a ladder, but if you’re allergic to ladders, use a pair of binoculars to check your roof from your yard. Look for loose and missing shingles. If anything looks unusual, investigate further yourself or call a roofing contractor.
• Take a close look at your chimney. “Do this even if the winter was mild,” Lesh says. “High winds, rain, and snow can damage a chimney. Look for cracks, missing mortar, loose bricks or boards, and signs of rot.” If any of those things are present, call a chimney sweep certified by the Chimney Safety Institute of America for a repair estimate. If the metal flashing and the cap on a chimney are galvanized, Lesh says, check to see if they look brownish, which means they’re rusting and should be replaced. Also, make sure the cap is still present but hasn’t collapsed and covered the flue opening, which could cause a dangerous carbon monoxide buildup inside the house. Expect chimney repairs to start around $200.
• Examine your drainage. Make sure soil slopes away from your foundation at least 6 vertical inches in the first 10 feet on all sides of the house and that there are no areas of standing water. If you have properly sloped foundation drainage but still have areas of standing water, consider a landscaping solution, such as a swales (contoured drainage depressions), berms (raised banks of earth), terraces, or French drains (a shallow, gravel-filled trench that diverts water away from the house).
• Take a look at your siding. Has any of it come loose or begun to rot? Repair any damaged sections before moisture has a chance to set in. No matter what your siding is made of (wood, vinyl, brick), it may need a spring cleaning. The best DIY method for any kind of siding is a bucket of soapy water and a long-handled brush. A power washer is not recommended and should only be handled by a professional cleaning contractor. If you choose to have your siding professionally cleaned, expect to pay $300–$500 depending on the size of your home.
• Schedule your biannual HVAC appointment. Get ready for the air conditioning season with your spring tune-up. If your system wasn’t running well last season, be sure to tell your contractor, and make sure he performs actual repairs if necessary rather than simply adding refrigerant. “He shouldn’t just charge it up,” Lesh says. “That will work for a while, but it won’t last. Freon lasts forever—if your system is low, there’s a leak somewhere, and he should tell you specifically what he’s going to check to fix it.” Expect to pay $50–$100.
Your contractor’s maintenance checklist should include checking thermostats and controls, checking the refrigerant level, tightening connections, lubricating any moving parts, checking the condensate drain, and cleaning the coils and blower. Duct cleaning, while it probably won’t hurt anything, is not necessary; be wary of contractors who want to coat the inside of the ducts with antimicrobial agents, as research has not proven the effectiveness of this method and any chemicals used in your ducts will likely become airborne.
On your own, make sure your filters are changed and vacuum out all your floor registers.
• Check your GFCIs. The U.S. Consumer Product Safety Commission recommends that you do this once a month, and it’s a good idea to incorporate it into your spring maintenance routine. GFCIs (ground fault circuit interrupters) are electrical outlets that protect you from deadly electrical shocks by shutting off the power anytime even a minimal disturbance in current is detected. They feature two buttons (“test” and “reset”), and should be present anywhere water and electricity can mix: kitchens, bathrooms, basements, garages, and the exterior of the house.
To test your GFCIs, plug a small appliance (a nightlight, for example) into each GFCI. Press the test button, which should click and shut off the nightlight. The reset button should also pop out when you press the test button; when you press reset, the nightlight should come back on.
If the nightlight doesn’t go off when you press the test button, either the GFCI has failed and should be replaced, or the wiring is faulty should be inspected. If the reset button doesn’t pop out, or if pressing it doesn’t restore power to the nightlight, the GFCI has failed and should be replaced. These distinctions can help you tell an electrician what the problem is—neither job is one you should attempt yourself if you don’t have ample experience with electrical repair.
Spending a weekend or two on maintenance can prevent expensive repairs and alert you to developing problems before they become serious. Be sure to check out the comprehensive seasonal to-do list following this article, and visit the links below for more detailed information on completing tasks or repairs yourself.
Source: http://www.houselogic.com/articles/spring-summer-seasonal-maintenance-guide-midwest/
Sunday, May 16 2010
Appraisers and real estate agents offer advice for curb appeal that preserves value and attracts potential buyers.
Curb appeal has always been important for homesellers. With the vast majority of today’s homebuyers starting their search on the Internet, the appearance of your property is more critical than ever. You only have a few seconds to catch their attention as they scroll through listings online to get them to stop and take a closer look.
But the role of curb appeal goes beyond just making a good first impression. The way your house looks from the street can impact its value. It can also shorten the time it takes to sell your house.
We asked real estate agents, appraisers, home stagers, landscape designers, and home inspectors which curb appeal projects offer the most value when your house is on the market, both in terms of its marketability and dollars. Here is what they told us:
1. Paint the house.
Hands down, the most commonly offered curb appeal advice from our real estate pros and appraisers is to give the exterior of your home a good paint job. Buyers will instantly notice it and appraisers will note it on the valuation.
“Paint is probably the number one thing inside and out,” says Frank Lucco, managing partner of Houston-based IRR-Residential Appraisers and Consultants. “I’d give additional value for that. If you’re under two years remaining life (on the paint job), paint the exterior because it tends to show wear badly.”
Just make sure you stay within the range of accepted colors for your market. A house that’s painted a wildly different color from its competition will be marked down in value by appraisers.
2. Have the house washed.
Before you make the investment in a paint job, though, take a good look at the house. If it’s got mildew or general grunge, just washing the house could make a world of difference, says Valerie Torelli, a California real estate agent with a background in accounting.
Before she puts a house on the market, Torelli often does exterior makeovers on her clients’ homes, a service she pays for herself to get higher selling prices. Overall, she says her goal is to spend less than $5,000, with a goal of generating an extra $10,000 to $15,000 on the sale price.
Torelli specifies pressure-washing—a job that should be left to professionals. Pressure washing makes the house look “bright and clean in addition to getting rid of unsightly things like cobwebs, which may not be seen from the yard but will detract from the home’s cleanliness when seen up close,” she says.
The cost to have a professional cleaning should be a few hundred dollars—a fraction of the cost of having the house painted.
3. Trim the shrubs and green up the yard.
California real estate agent Valerie Torelli says she puts a lot of emphasis on landscaping, such as cutting down overgrown bushes and replacing them with leafy plants and annuals mulched with beautiful reddish-brown bark. “It runs me $30 to $50,” says Torelli. “Do you get a return on your money? Absolutely. It sucks people in.”
You also don’t want bare spots. Take the time to fertilize the yard, throw out some grass seed, and if need be, add some sod.
4. Add a splash of color.
It could be a flower bed of annuals by the mailbox, a paint job for the front door, or a brightly colored bench or an Adirondack chair. “You can get a cute little bench at Home Depot for $99,“ Torelli notes. “Spray paint it bright red or blue and set it in the yard or on the front porch.”
It’s not a bad idea, but don’t plan on getting extra points from an appraiser for a red bench, says John Bredemeyer, president of Realcorp in Omaha. “It’s difficult to quantify, but it does make a home sell more quickly,” Bredemeyer says. “Maybe yours sold a couple weeks faster than the house down the street. That’s the best way to look at these things.”
5. Add a fancy mailbox and house numbers.
An upscale mail box and architectural house numbers or an address plaque can give your house a distinctive look that stands out from everyone else on the block. Torelli makes them a part of her exterior makeovers “I’ve gotten those hand-painted mailboxes,” she says. “A nice one runs you $40 to $50.” Architectural house numbers may run as high as a few hundred dollars.
6. Repair or clean the roof.
Springfield, Va.-based home inspector and former builder Reggie Marston says the roof is one of the first things he looks at in assessing the condition of a home. He’ll look at other houses in the neighborhood to see if there are a lot of replaced roofs and see if the subject house has one as well. If not, he’ll look for curls in the shingles or missing shingles. “I’m looking at the roof for end-of-life expectancy,” he says.
You can pay for roof repairs now, or pay for them later in a lower appraisal; appraisers will mark down the value by the cost of the repair. That could knock thousands of dollars off your appraisal. According to Remodeling Magazine’s 2009-2010 Cost vs. Value Report, the average cost of a new asphalt shingle roof is more than $19,000.
“Roofs are issues,” Lucco says. “You won’t throw money away on that job. You gotta have a decent roof.”
Stains and plant matter, such as moss, can be handled with cleaning. It’s a job that can often be done in a day for a few hundred dollars, and makes the roof look like new. It’s not a DIY project; call a professional with the right tools to clean it without damaging it.
7. Put up a fence.
A picket fence with a garden gate to frame the yard is an asset. A fence has more impact in a family-oriented neighborhood than an upscale retirement community, Bredemeyer says, but in most instances, appraisers will give extra value for one, as long as it’s in good condition. “Day in a day out, a fence is a plus,“ Bredemeyer says. Expect to pay $2,000 to $3,500 for a professionally installed gated picket fence 3 feet high and 100 feet long.
8. Perform routine maintenance and cleaning.
Nothing sets off subconscious alarms like hanging gutters, missing bricks from the front steps, or lawn tools rusting in the bushes. It makes even the professionals question what else hasn’t been taken care of.
“A house is worth less if the maintenance isn’t done,” Lucco says. “Those little things can add up and be a very big detractor. When people say, ‘I’d buy it if it weren’t for all the deferred maintenance,’ what they’re really saying is, ‘I’d still buy it if you reduce the price.’”
Source: http://www.houselogic.com/articles/8-tips-adding-curb-appeal-and-value-your-home/
Wednesday, May 05 2010
The backyard will be the summer entertainment hot spot as Americans seek affordable ways to spend time with family and friends. But your outdoor party can be spoiled quickly if unwelcome insects show up.
More than half of backyard revelers have moved a party indoors due to mosquitoes, and 46 percent have left a party to escape the pests, according to a new survey from the makers of OFF! PowerPad Lamp and Lantern.
Create an unforgettable party within a tight budget with these five tips from Natalie Ermann Russell, author of “The Outdoor Entertaining Idea Book:"
1. Keep decor simple: Save money on decorations by making the most of the greenery and foliage that surround you. Simple potted plants as center pieces create an elegant setting at little cost, and they’ll last much longer than cut flowers.
2. Set a realistic menu: Give yourself a break by creating a menu that is realistic for your budget and your schedule. To get the best prices, focus on foods that are in season and check out your local farmers’ market for deals. Using produce from the farmers’ market also makes for less work -- the flavors of these foods are so intense and beautiful, they’re at their best when prepared simply. For example, a pasta primavera with blanched farmers’ market veggies can be assembled quickly, and is super colorful and so delicious.
3. Invite guests to pitch in: The beloved potluck is making a comeback. Your friends and family will enjoy contributing to the event, but be sure to be specific about what you need so that you end up with a good variety of foods. And establishing a theme can make it even more fun. For instance, call it the Fresh from the Farmers’ Market Potluck, where each person brings a dish to highlight a different fruit or vegetable that’s in season.
4. Keep away mosquitoes for less: OFF! PowerPad Lamp can repel mosquitoes from an area of up to 15 by 15 feet -- the size of an entire patio -- for less than $10. It would take 15 citronella candles at a cost of up to $60 to protect this same area.
5. Plan right: The fear of running out of food often drives hosts to prepare twice as much food as they need -- at twice the cost. Know your head count beforehand and shop accordingly. A general rule of thumb is to plan for six to eight ounces per person of the main protein (e.g., steak, fish, chicken) and one to two ounces of a side dish like rice or pasta.
Use these simple and affordable tips to entice your guests to linger at your next outdoor party. For more information about how to combat mosquitoes, visit www.offprotects.com.
Courtesy of ARAcontent
Source: http://www.onlinecooking.net/index.php?option=com_content&view=article&id=1943:create-memorable-outdoor-parties-for-less&catid=126:entertainment&Itemid=48
Friday, April 23 2010
If you aren’t sure whether your property or business is at risk from disasters caused by natural hazards, check with your local building official, city engineer, or planning and zoning administrator. They can tell you whether you are in an area where hurricanes, floods, earthquakes, wildfires, or tornadoes are likely to occur. Also, they usually can tell you how to protect yourself, your house, business and property from the different hazards.
Select a category below to view any of the resources listed here.
Protect Your Business from All Natural Hazards
- Protect Business Records and Inventory
- Install a Generator for Emergency Power
Protect Your Property from an Earthquake
- Anchor Large Equipment Properly
- Anchor Tall Bookcases and File Cabinets
- Anchor and Brace Propane Tanks and Gas Cylinders
- Bolt Sill Plates to Foundation
- Brace Cripple Walls
- Install Latches on Drawers and Cabinet Doors
- Mount Framed Pictures and Mirrors Securely
- Restrain Desktop Computers and Appliances
- Use Flexible Connections on Gas and Water Lines
Protect Your Property from Fire
Protect Your Property from Flooding
- Build With Flood Damage Resistant Materials
- Dry Floodproof Your Building
- Add Waterproof Veneer to Exterior Walls
- Raise Electrical System Components
- Anchor Fuel Tanks
- Raise or Floodproof HVAC Equipment
- Install Sewer Backflow Valves
- Protect Wells From Contamination by Flooding
Protect Your Property from High Winds
- Maintain EIFS Walls
- Protect Windows and Doors with Covers
- Reinforce Double Entry Doors
- Reinforce or Replace Garage Doors
- Remove Trees and Potential Windborne Missiles
- Secure Metal Siding and Metal Roofs
- Secure Built-Up and Single-Ply Roofs
- Secure Composition Shingle Roofs
- Brace Gable End Roof Framing
Source: http://www.fema.gov/plan/prevent/howto/index.shtm
Thursday, April 08 2010
Fix fences, tighten your home’s energy efficiency, repair a screen door and make 8 cheap, fun improvements to give your home’s entrance some spring sparkle.
Finally, it’s spring. To celebrate, do a few improvements indoors – tweaking your home’s energy efficiency and getting doors to operate smoothly – and then get outdoors to do some work that shows off your home’s exterior. Install a new screen door or repair an old one. Maintain fireplaces and gas appliances while avoiding the scammers who pop out of the woodwork like bugs this season. Repair fences. Remove stubborn stains from concrete garage floors, patios and sidewalks. And try one or all of our eight cheap and fun ways to give your home’s entrance some exciting spring sparkle.
Read entire story here: http://tinyurl.com/yhg66ho
Tuesday, March 23 2010
Household pests want the same things you do—food, water, shelter—and will seize any opportunity to satisfy their needs. You can’t stop every pest from ever flying, crawling, or burrowing into your home, but you can make sure the occasional intrusion doesn’t become an all-out invasion.
Once a major infestation occurs, you’ll likely need professional help. But if you focus on prevention, you can tackle many aspects of pest control yourself, save money, and avoid adding pesticides to the environment.
You’ll find the materials—hardware cloth ($8 per 6-inch-square swatch), door weather stripping ($8 per 17-foot roll of 7/8-inch v-strip polypropylene), O rings for faucets (pennies)—you need at most home improvement stores.
And many of the steps to impeding pests’ access—clearing overgrowth from around foundations and disposing of wood scraps and other debris that accumulate in garages and along sides of houses—are things every homeowner should do as part of regular house and yard maintenance.
The effort—a few hours or a weekend a few times a year—and cost of supplies are well worth it to avoid having to repair thousands of dollars in damage caused by pests.
Start outside
Termites eat wood and carpenter ants tunnel into wood to nest. So remove piles of wood and other debris from around your home. The same goes for rotted stumps and logs. Keep firewood at least 20 feet away and five inches off the ground. And never bury wood scraps or waste lumber.
Maintain at least 6 inches of clearance between soil and structural wood to prevent decay, which attracts carpenter ants, and to make it tougher for termites to find their next meal.
Keep it dry
Termites, carpenter ants, and powderpost beetles thrive in moist areas, so maintain a Sahara zone around your home’s perimeter.
In general, you shouldn’t have any vegetation—bushes, shrubs, vines, trees—touching the house, which can trap moisture that causes rot and attracts pests. Many pests use vegetation as a bridge between the ground to the walls and roof of your home.
Keep foundation plantings (shrubs, bushes, perennials) and wood mulch at least 18 inches away from the foundation. Prune trees, bushes, and vines that touch or overhang the house. And don’t plant anything close to your home that’s aphid-prone, such as peonies or roses. That’s like ringing the dinner bell for carpenter ants, which feed on honeydew, a sweet liquid produced by aphids.
Even an infrequent puddle close to the house can become an oasis for pests on the prowl for food, so take measures to direct water away from the house. Drain puddles, don’t overwater flower beds, point sprinklers away from the structure, and make sure the ground near the foundation slopes away from your home. Use drain tile if the site is flat.
Clean gutters so they don’t overflow. Use downspout extensions and splash blocks to direct rainwater runoff away from the foundation. Fix dripping faucets, water pipes, and air conditioning units. Even small leaks can contribute to wood rot and moist foundations that pests find irresistible.
Deny access into your home
The tiniest gap or crack can become an express lane for pests—and not only insects. “If you can push a pencil through a hole, a mouse can get through it,” says Greg Bauman, senior scientist with the National Pest Management Association.
Inspect your home’s envelope (walls, doors, windows, roof) for possible points of entry as well as moisture-inducing leaks. Use caulk or epoxy to seal any cracks in the foundation or gaps in the structure. Use steel wool or hardware cloth (1/4-inch wire mesh) to block any openings where wires, pipes, and cables come into or out of the house.
Should you detect any moisture damage, repair it promptly. Carpenter ants flock to deteriorating wood, but often move from decayed wood into sound wood as the colony expands. Replace punky fascia, soffits, and shingles. While you’re at it, paint weathered and/or unfinished wood to stop carpenter bees from drilling holes to build their nests.
Ventilate attics and crawl spaces, and make sure vents aren’t blocked by debris or vegetation. Good air flow prevents the buildup of moisture. Cover any exposed earth in the crawl space with a plastic vapor barrier.
Make sure roof and foundation vents are protected with hardware cloth. Install screens on all floor drains and windows. And while you’re at it, caulk or install weather-stripping around windows and doors as well. Close any gap between your garage door and the floor by attaching a door sweep. And keep the door closed.
Be inhospitable
If pests do get inside, they’ll usually die or skedaddle if they can’t find anything to eat or drink.
Carpenter ants will eat almost anything you do, but are especially fond of sweet and greasy food. Put kitchen waste in a sealed trash can, sweep up crumbs, and wipe up spills right away. Termites typically feed on wood, but will eat anything with cellulose, so never store paper or cardboard—or wood—in the crawl space.
Deal with interior moisture, too. Inspect the base of toilets, around bath tubs and shower stalls, and areas where pipes go through walls, such as under sinks. Repair any leaks and wrap any pipes that produce excess condensation.
Check behind and under washing machines and dishwashers, which are notorious for leaks, to make sure there’s no condensation or old moisture damage. Fix leaky faucets; in some cases, replacing a simple O ring might not only save water, but also stave off a potential invasion of pests.
Brad Broberg is a freelance writer from Federal Way, Wash. A former newspaper reporter and editor, he writes about business, health care, and real estate for REALTOR Magazine, the Puget Sound Business Journal, and Seattle Children’s Hospital, among others. He’s lived in the same home for 22 years—a home he shares with seven towering Douglas firs.
Source: http://www.houselogic.com/articles/prevent-insects-damaging-home/
Thursday, December 17 2009
-- Don't ignore safety
This goes for any home-improvement project. Simple precautions like wearing safety goggles, not overloading outlets and turning off breakers will only take a few minutes or a few extra bucks -- but these steps can save you from disaster.
-- Don't forget about the subfloor
Laminate flooring needs an underlayment/vapor barrier for almost any surface upon which it is being installed. Not only will a subfloor protect flooring from moisture, it will also help with soundproofing. Hardwood floors need an even subfloor; use subfloor compound to ensure a level surface. If laying tile in a bathroom, cement backer board should be used underneath.
-- Don't skimp the grout sealer
You can spend a lot of time and money installing tile, but if you don't properly seal the grout it can absorb water, dirt and other stains.
-- Don't get the wrong pro
If you need to hire a pro, make sure the person is qualified for the job. Never let anyone other than a licensed electrician repair or alter the wiring in your home. The same goes for plumbing -- many states also require them to have a license or state certification.
-- Don't skip the primer
The key to a successful paint job is comprehensive preparation. A coat of primer will seal the surface, provide durability and create a solid bond for the paint to adhere. The only time primer may not be needed is when painting latex over latex, and the colors have a similar intensity.
-- Don't forget the building permits
The last thing anyone wants is to spend time and effort building a beautiful deck only to find out it must be ripped up because there was no permit. Check out the rules and regulations for building permits, codes and inspections before you start any remodeling project.
-- Don't get the wrong style of window
The wrong windows can have consequences on both the interior and exterior of the home. When choosing windows, make sure the style matches the appearance and architecture of your home's exterior. On the inside, windows will affect the light, ventilation and temperature of the house.
Source: http://www.courierpress.com/news/2009/dec/16/101-ideas-seven-home-improvement-mistakes-avoid/?partner=RSS
Monday, October 05 2009
More than 80 percent of new single-family homes have at least two bathrooms, which occupy an average of 300 square feet of floor space, or 12 percent of the total area, according to a study by the National Association of Home Builders.
The home builder’s study reports a major return on value for extra bathrooms: "When the number of bathrooms is approximately equal to the number of bedrooms, an additional half-bath adds about 10 percent to the home's value, and one additional bath adds about 19 percent."
A mid-range bathroom remodel, which costs $10,500 on average nationwide, repays a home buyer at least 100 percent of the outlay when the property is sold, the home buyer study concludes.
Source: Chicago Tribune, Mike McClintock (09/21/2009) http://www.realtor.org/RMODaily.nsf/pages/News2009100503?OpenDocument
|
|
|


